


If you are considering purchasing a granny flat kit home, of course you are going to have a few questions and concerns. What I hope to do in this article is cover them all. So, here is what we will be addressing today:
- What it Costs to Build a Granny Flat Kit Home
- What Your Granny Flat Kit Home Includes for This Price, and What is Excluded
- Granny Flat DIY Kits, How to Install Them
- Kitchens and Kitchenettes for Your Granny Flat Kit Home
- Our Portable Granny Flat
- What Is a Granny Flat Kit on Wheels
- What Size Your Granny Flat Kit Home Is Allowed to Be
- How To “Cyclone Proof” Your Granny Flat Kit Home
- If You Can Build Your Own Granny Flat
- If You Can Add Extensions to Your Granny Flat Kits
- Floorplans for Granny Flat Kits
- Our Granny Flat Kit Guide
So, I will be going into enormous detail about your granny flat kit home (you may also see these called a flatpack). Let’s not waste time, let’s begin.
DON’T PAY A FORTUNE FOR YOUR GRANNY FLAT. Find out how to deal with council and build a granny flat for the lowest cost possible. Learn More.
DON'T PAY A FORTUNE FOR YOUR GRANNY FLAT. Find out how to deal with council and build a granny flat for the lowest cost possible. Learn More.
Granny Flat Kit Cost
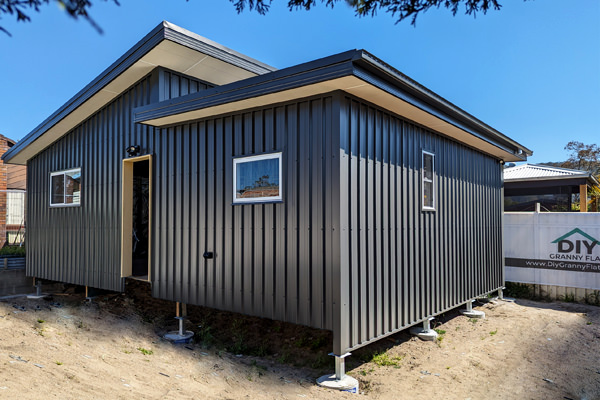
Our granny flat kits start at around $1200 + GST per square metre. This is complete to lockup stage.
So, for example, for a 60 square metre granny flat kit, the largest that you are allowed in NSW, the total cost would be $72000 + GST.
I will go over what this does and does not include below.
What Comes with Your Granny Flat Kit?
Complete to lockup means that your granny flat kit comes with the below:
- All windows.
- All doors.
- Roofing, including fascia and gutters.
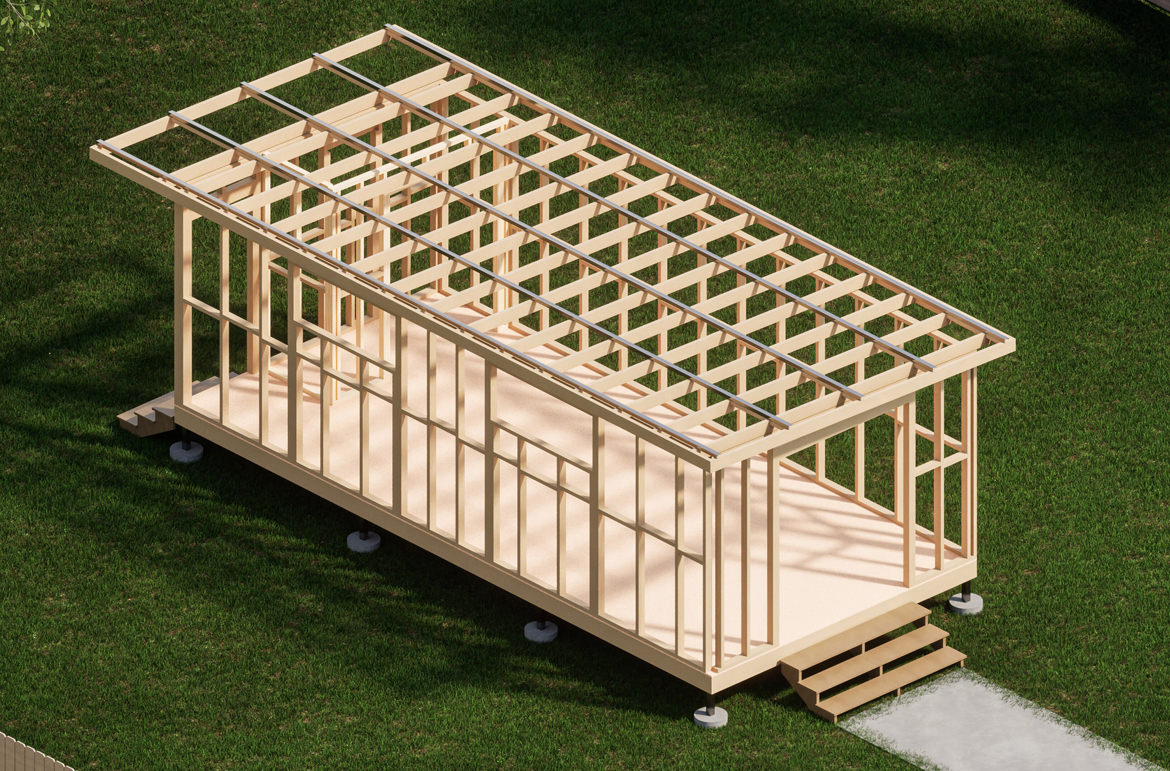
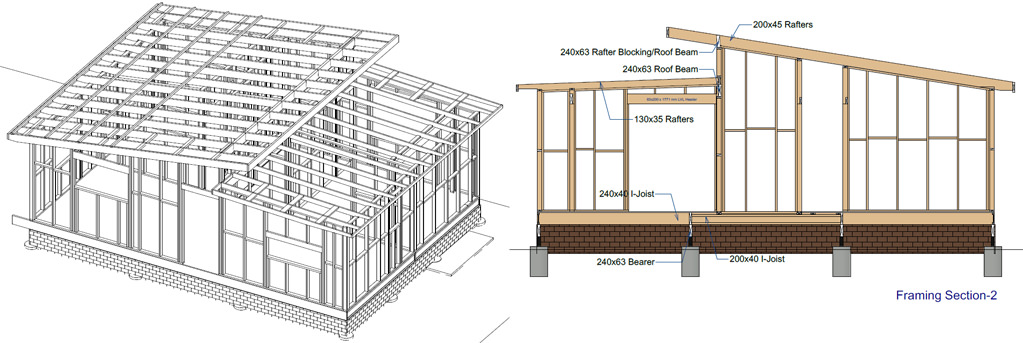
- Framing – This is a frame designed to be able to be transported, usually steel. This is so they will not be bent out of shape whilst being moved.
- Insulation.
- Interior gyprock (plastered wall sheets).
- Utilities – Your electricity, such as power points, lights, and wiring have been installed, and so has your plumbing. These are all compliant with Australian standards. You will just need a certified electrician and a certified plumber to come to site to finish the fit out of the kit home.
- A manual with detailed instructions about how you install the kit home.
What Does Not Come with Your Granny Flat Kit?
This is important to note, as this is often where people tend to be mistaken. That is, they are of the belief that your granny flat kit will come with everything that you need to finish the build.
I will tell you the truth though. It is essential that you read your “kit-list”, as you will see that it is usually missing several things that you may want or may be necessary.
Our granny flat kit homes, for example, do not come with the below:
- A kitchen.
- A bathroom.
- Flooring (carpet, vinyl, or laminate floorboards).
- Your foundation – such as a concrete slab or piers.
To explain a bit better – for $1200 + GST per square metre to lockup, you will get an empty shell.
This may make you may wonder, what am I paying for then? Well, to put it simply, you will not get the bottom bit, but you will get everything that sits above the ground.
Here are also some examples of what you might choose to pay if you would like to choose a design that comes with a bathroom.
We can, of course, add in a bathroom or kitchen for you. Our prices for these can be seen here. (Dean, please link to new page with prices).
Another point to note is that it is a kit home, so the kit is not built specifically for the region in which you reside. Different suburbs may have different regulations. I will also go over this in the sub-heading “Cyclone Rated Granny Flat Kit”, where I elaborate on how you can work with the kit home you have been given, so it does then abide by the regulations for your area.
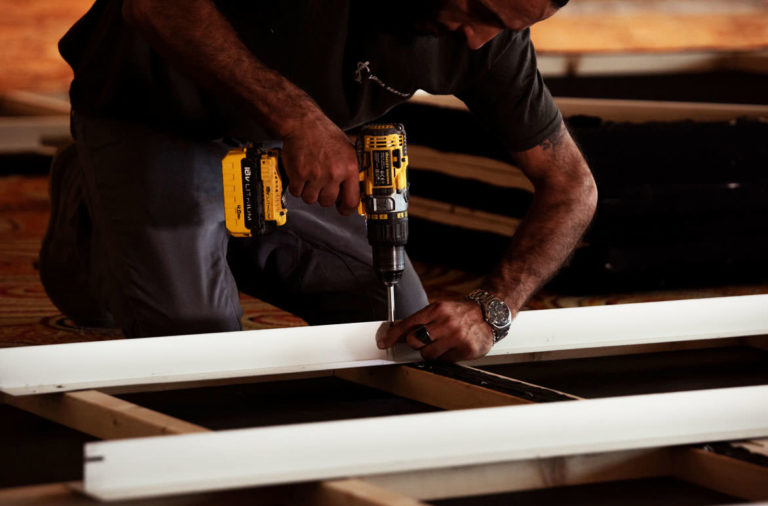
Granny Flat DIY Kit
Never built anything before and worried that you will have trouble installing your granny flat kit home? Perhaps wondering if you need a builder as you know nothing at all about building?
Well, let’s be honest again. You will need to do more than just follow the instructions that are in the manual that you receive with your kit home.
A snap shot of instructions showing the installation of a kit granny flat
To ensure that your granny flat kit home, when finished installing, receives its’ Occupation Certificate, it will be wise to get some guidance from builders about certain things.
The things that I recommend you get assistance with are how to:
- Build your foundation.
- Tie-down – That is, bracing your roofing to your foundation, and the frame to your roofing.
- Completion of your roofing – installing things such as downpipes.
I suggest you get help from people with knowledge in these areas, to make sure that you are safe throughout the process, as these can all be rather high-risk jobs.
They are also quite tricky – so if you do not know how to do them, and so you make an error by missing just one step, or you do everything, but not in the right order, this can create a big issue.
There are very simple things that many people are not familiar with but will make you be unsuccessful when having your inspection. For example, attempting but failing to get the correct angles, or missing one tie-down, will mean that you will not get your work certified.
So, for those jobs that you do not have the confidence that you can complete yourself, I do recommend that you hire a certified builder or trades people to assist. You must have licenced plumbers and electricians for any construction in Australia at the very least.
We here at DIY Granny Flat are also happy to help with this – we do know a lot of builders in the construction industry, so you are welcome to ask us to point you in the direction of one or more in your region so you can get some quotes.
Because in the end, we want you to love your granny flat kit home just as much as we do.
When the kit comes together it, it will be all worth it.
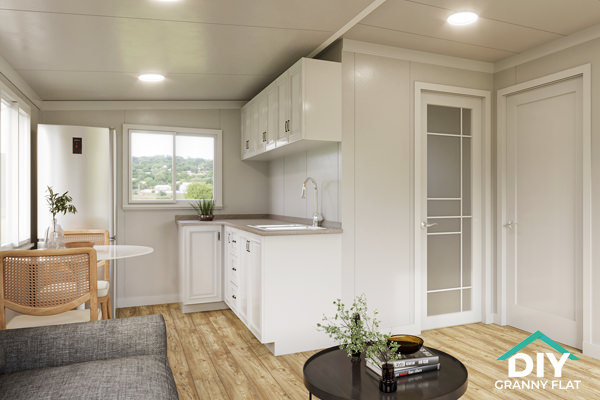
Granny Flat Kitchenettes
I will touch on kitchenettes just briefly, as you may choose to put one of these in your kit home, rather than a full kitchen.
A kitchenette is basically a smaller version of a kitchen. They tend to contain just the basic, smaller appliances, such as a sink, a small fridge, and a microwave.
Many people choose to put these in a studio apartment, as these are smaller than your average granny flat, so they take up less space.
You can get some ideas for kitchenette designs in this article on Studio Granny Flats.
As mentioned, if you choose to go with us to lockup for your kit home, we can place a kitchen in your design. Or you can always choose to install your own after, by buying these products from Bunnings. If you choose to do this, here is another great website that can help you plan your design by showing you what it will look like in 3D.
Portable Granny Flats
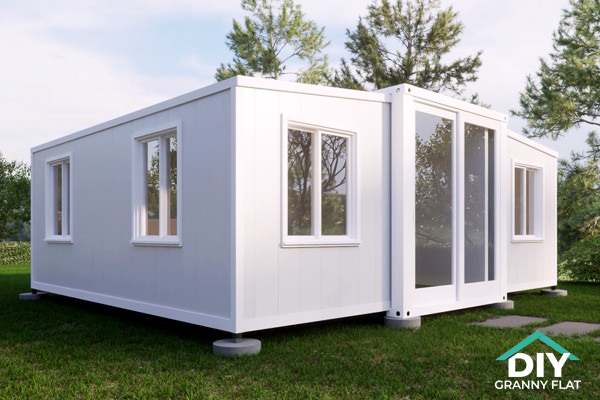
We also have another version of a kit home, known as the Expandable.
This is a two-bedroom granny flat with a kitchenette (no stove or oven) and a bathroom.
The expandable kit home can be set up in a few days as bathroom and kitchen is already included
So, if you are looking for a design that already includes all of these things, this may interest you.
It is called the Expandable as it is just that – an expandable, fold-out container home.
What makes this different than your normal kit home is it has the ability to fold out. It is equipped with simple mechanisms that allow the walls, floor, and roof to extend and retract when required.
So, it can fold down to a compact size, allowing it to be delivered to you in a shipping container, and it simply expands to a two-bedroom granny flat when on site.
The expandable interior is a very comfortable place to rest
The other advantage of it is that, once delivered, it only takes a few hours to fold out. This means your costs for construction are reduced. Most of the other work required can be done with the help of a few friends or local tradesmen.
To finish installation of this kit home you will need to complete the following:
- Slide out its’ adjustable legs, next to a 7 x 7m wide space that you have pre-levelled.
- Lift up your roofing and ensure this is held in place with some strong steel posts whilst waiting to lift your walls.
- Fold down your flooring so it meets the adjustable legs you have already pulled out.
- Once the flooring is in place, unfold/expand both of your side wall, lifting them up until they connect to your roof. Once in place, you can now remove the steel posts that were holding them there.
- Now unfold your other side walls up in the same manner.
- All four walls should now be in place, so now just bolt them into their position.
- Put your internal partition walls in place, and now you have your rooms inside, such as a bathroom, bedroom living room, and kitchen.
- To the corners of each wall, stick duct tape. This ensures that wind does not get inside your home, that it is sealed.
- Put up your flashing and guttering.
- Your structure is now installed. You may just need to put in any windows. These will just slide into their place, and all you need to do is bolt them down. Any glue processes that were required would have been performed by us before this unit was delivered.
- Now you only need to complete the installation of the interior. Begin by fitting PVC corner plates on all L-shaped corners with rivets. This is just a decorative process – it hides the framework, making the corners look ‘cleaner’.
- Install skirting using mounting screws. This too is just a decorative step.
- Finally, screw in your kitchen cupboard and install this against the walls. This has been pre-made so there are no fiddly parts to have to deal with.
That is all – it really is that easy.
We have also added the most modern technology and advanced features. It is the most up-to-date unit you will see on the market in Australia.
You also have a 3-year warranty, so have nothing to worry about.
And it can be delivered this right to your door, if you live in WA, NSW, VIC, or QLD, to both suburban and rural areas.
NOTE: You will need to have your foundation or footings completed before delivery and have the work done from your electrician and plumber – those that will come out to connect your water and electricity on-site.
Granny Flat Kit on Wheels
A lot of companies are selling expandable dwellings, ones that are similar to the Expandable that we discussed above, but when they are placed upon a trailer. An example of just one granny flat kit that is on wheels can be seen here.
Why, you may ask? Well, by putting them on wheels, they are classed as a ‘caravan’. As this dwelling will comply with what is legally defined as being a caravan as long as:
- It has a trailer under it.
- That trailer has chassis and wheels that are compliant with that of a trailer.
- A VIN Number.
- An emergency brake.
And in NSW, the legislation, which you can read here, says that Council approval for caravans is not needed in the same way that fixed granny flats are needed.
So that means that yes, you may be able to have them on your site, without needing to get a Development Application (DA) or Complying Development Certificate (CDC).
I say may, as there are some points that you will want to take note of in the legislation. These include the below:
- Section 77 (1) says that they can be used on a vacant block of land. But only for a limited time – a maximum of 60 days per year, and no more than 48 hours (2 days) at any time.
- Section 77(b) says that you are allowed one caravan on land tenanted by the caravan’s owner who has a connection to the owner of the property on the land. In many cases, this will mean that the person who owns the caravan is probably going to also be the person who owns the house.
So many companies are choosing ‘caravans’ as what they see as being a quicker and easier option, instead of a granny flat kit home or portable, as they can get away without having to get Council approval, so you can set them up on site and live in them straight away.
However, there are restrictions and regulations on who is allowed to live in them, where, and how long for, which are of the utmost importance to research prior to making this purchase.
For more information on this, including on how you do get Council approval if required, you can read my blog, Caravans As Granny Flats – Here are the Rules.
How Big Can the Kit Be?
The answer to this – as big as you want, as long as you are complying with the Councils’ regulations for your region, which you can read in this blog.
So, the choice is yours. You can have us design your kit home as a Studio Apartment, a Backyard Cabin, a one-bedroom granny flat, a two-bedroom granny flat, even as big as a three-bedroom granny flat. We will supply the materials and design the granny flat based on your exact plans, so have fun drawing your plans and creating the design that is just right for you and your property.
Or you can choose from designs and floorplans we have already drawn up. You can view our range of Cabins here, Studios here, and granny flats here.
Of course, we are not the only one that you can choose from. Feel free to view some other great designs and floorplans here to get some ideas, and some examples of their prices. We’ve done the research for you, so you don’t have to.
Cyclone Rated Granny Flat Kit
In cyclonic areas, you will granny flat kit will require additional reinforcement, and this will not be included as part of the kit. This is because the granny flat kit home is not built just for your area, so you will have to make these adjustments.
It is essential that you do build your kit home in accordance with these regulations. If you do not, you will end up having trouble getting your certifier put their signature on your Occupation Certificate, as they will deem it to be unsafe.
So, you must make the below adjustments to your kit home to ensure it is cyclone rated.
Firstly, do your research on the wind category rating for your area. As Australia has four Cyclonic Regions, all with different wind categories.
If you are not sure if your existing property is in a cyclonic region, you can view this map that shows the wind categories throughout Australia as per the National Construction Code.
If you do fall in a cyclonic area, it may be helpful to enlist the intelligence of a structural engineer, who can analyse your property, the design of your granny flat kit home, and the regulations, and they will determine the wind rating requirements.
The good news is that as your kit home has already been designed to hold up against high winds and movement because they are transported to site, not a lot of structural changes need to be made in order to reach a high cyclonic rating.

Many parts of Australia have cyclone areas and kit granny flats must meet specific requirements
Some upgrades that you will be required to make include the below:
- Doors – These will need to be secured with barrel bolts. Upgrading these to doors that hold up against the pressure of strong winds and that water cannot penetrate, such as roller doors that have been designed for cyclonic areas, is recommended.
- Windows – These will also need to be upgraded to be able to withstand the wind pressure and so that water cannot enter. Requirements may be mesh screens, bolted shutters and shatterproof glass.
- Roofing – Battens to be changed to cyclonic battens, which are to be firmly secured to the roof trusses with screws. Trusses to be fastened to walls using straps or bolts. You just need to be sure that you meet height restrictions for you kit granny flat.
- Framing – Upgrade this by placing more studs, so they are closer to one another.
- Fixtures – All fixtures and screws to be cyclone-rated. For example, guttering to be firmly secured to the granny flat.
In some extreme circumstances, your roof sheeting may to be replaced with cyclone rated roof sheeting, and then the sheeting must be attached to roof battens using screws or clips. Some other times, the engineer may need you to tie-down the walls on the inside.
Your foundation must also be cyclone rated. This will be footings that secure it to the ground and must be set to the suggested weight and depth.
Can You Build Your Own Granny Flat Kit?
You may be wondering – surely this work I can do myself, rather than having someone else build the granny flat for me?
Yes, you are correct.
You can build your own granny flat kit as what is known as an “owner-builder“. Many people, including myself, choose this option as it saves them money when building, rather than hiring a builder.
An owner-builder is, simply put, a certificate that you can obtain to be able to build your own granny flat.
Australia does have very strict regulations about obtaining this though, all of which you can read about, step by step how to do, in my blog, Can You Build Your Own Granny Flat?
Here I also discuss what you can and cannot do throughout the build – that is, what trades you will need – and what permits you will need to obtain along the way.
One thing I will advise you though is that the permits, Certifications and Council fees that you will need are not only going to vary from state-to-state Australia-wide, but also between Councils. As such, I recommend that you contact your own local Council for their input on what your specific regulations are, and how much the build will cost you.
But, if you want an idea of what it may cost, you can read here precisely what I paid when I built my own granny flat.
Granny Flat Extension Ideas
This is something that we can definitely do for you, as our granny flat kit homes are all built with Australian standard materials.
We also supply the materials that you can use in Australia to build houses and granny flats, so there is no problem at all with us if you want to do extensions on your design, as long as you abide by your Councils regulations, all of which can be seen for your state in the blogs below:
Some ideas for extensions include:
Expand Rooms
If you have a big block, and so a lot of floor space to utilise, you can update whatever room/s you like. Such as you can have a bigger living area, or bigger bedroom.
Add a Deck or Porch
An outdoor area is a great way to increase the size of your granny flat without using any of the floor space you are allowed. So, consider extending your living space with a deck or porch.
As well as giving you extra space indoors, an outdoor area adds character to your granny flat. This can be designed in a style that suits the original structure and is in proportion to the size of the granny flat.
Add Al Fresco Dining
Perhaps you do not have the room for the kitchen you want inside the granny flat, but you want more than a kitchenette?
This is again where you can make use of your outdoor space, bring a space that is often left unused into your granny flat.
Consider adding an extension, such as a patio or verandah, that is both a kitchen and dining area.
With this extension you can have an outdoor dining area, where you sit facing the beautiful garden.
Or you could also expand your existing indoor kitchen/dining room outside with glass doors between the two, so the space between inside and outside can flow freely.
Extend Your Kitchen to Include Space for Lounging
With a simple change to the layout of your granny flat, you can extend your kitchen.
You can open up the area, if you have the room, by changing the design so there is an open space that includes the kitchen, dining room, and lounge room.
This can really enhance the entire area, as it may, for example, bring in more natural light to the entire ground floor.
Add Another Storey
Adding a second storey to your granny flat is a fantastic way to make the most of your available land space.
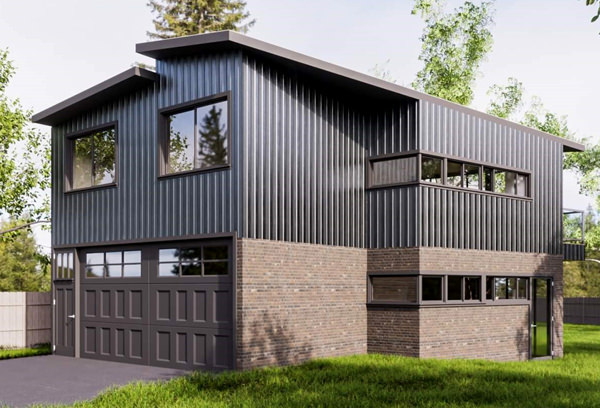
A 2 storey granny flat can still be built in kit form
Regulations and design ideas can be read about here.
Redesign the Layout to Connect the Granny Flat to the Garden
Another idea for an extension is to rethink and redo the entire floorplans.
Let’s say that you have found a granny flat kit home that you do actually like. But it would not sit well on your block – you would not have any natural light, or maybe you want a better view, such as a view of the garden.
Or, you need to consider the privacy and layout of your granny flat compared to the main house.
Then really, all you need to do is change up the floorplans. What was a kitchen can become a bathroom, and the kitchen can go where a bedroom was. Just shuffle the rooms around, basically, and you can still have the granny flat kit home that you like, but will be able to see your garden, and will have a granny flat where you can be nice and warm in summer, and cooler in winter.
Optional Extras
You also have the option to add ‘extras’ to your granny flat kit home, such as:
- More sliding doors.
- Security screens on doors.
- Cupboards in your bedrooms or kitchen for storage.
- Additional storage spaces.
- Amenities for those who are elderly or disabled, such as wheelchair ramps or handrails.
Some more ideas for your design can be seen in this article of mine, Granny Flat Ideas – 12 Ways to Craft an Incredible Granny Flat.
Stuck for ideas still? Or want to know if we can meet your specific requirements? Just jump on the phone and give one of our team members a call, as we would love to help find a solution for what you are looking for.
Granny Flat Kit Floorplans
When you are trying to figure out what is the ideal floorplan for you, consider these key factors. Cost. Accessibility. Size/number of rooms you would like.
But as well as your budget, keep in mind that you want a design that you are going to love, and that is one that really feels homely.
Whether you are looking for a spare room for when family or friends come to visit, to have as a playroom for a child or a sleepout for your teen, or an office you can work in from home, you should definitely take the time to explore the possibilities available to you.
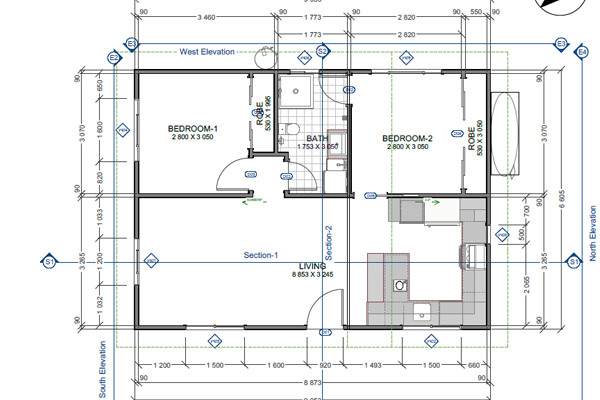
This granny flat floorplan works for open-plan living and space for a young family
While looking over the floorplans, ensure that you choose the correct layout for you, your property, and the way you like to live your life (or perhaps it be that of the renters that it is your goal to lease the granny flat out to).
Again, this is where we have done the investigations for you. You are more than welcome to see some of the floorplans from another granny flat designer in the Sydney area here, or some more granny flat kit homes here.
But we would love to introduce you to our assembly of granny flat kit homes also.
These are both affordable and adaptable – each design can be modified to suit your block of land.
So, let’s get into it, and let us show you the range of different sizes, styles and features that we have in our granny flat kit homes.
Granny Flat Kit Guide
To get your granny flat kit guide, a lot of clients ask where to start price-wise. The cheapest options can be seen here.
Conclusion
I hope in this article I have answered every question that you have about granny flat kit homes.
These are prefabricated kits that are built somewhere else, such as a warehouse, then delivered to you. So, when it arrives on your site, it will have nearly everything that you need, and will be ready to be installed.
They are inexpensive, and easy to set up – with a little help from a builder, you can assemble it yourself in a number of days. Though it is up to you to make sure that everything is set up correctly – even if what you need for the regulations for your area were not included in the kit itself.
If you still have more questions about granny flat kit homes, I have another article that may help – see “Granny Flat Kit Homes – The Little Known Problems That Can Come Up”. Here I also cover the pros and cons of kit homes, as everything has its’ advantages and disadvantages.
You May Also Like
About Me
I built my own Granny Flat from scratch. This blog was created to share everything I learned along the way and to answer common questions. I hope it helps you build your own granny flat as well!