


Thinking about converting an unused space into a granny flat, rather than building one from scratch?
So, can you convert a garage into a granny flat legally?
Yes, anyone can convert their garage into a granny flat, as long as they meet this specific regulations:
- Your property is 450sqm or bigger
- There is not another granny flat on your block
- Your land is in a residential zone
- If you have any fascia or eaves, these are fire-rated
- Your garage is less than 60sqm, and is located:
- Over 3m away from both trees and your rear property line
- More than 0.9m from your side boundaries
- OR, IF NOT, you may be able to gain approval by using a fire-rated wall on that which is too near your boundary
- The height of your living area and bedroom/s measure 2.4m or higher, from the inside.
DON'T PAY A FORTUNE FOR YOUR GRANNY FLAT. Find out how to deal with council and build a granny flat for the lowest cost possible. Learn More.
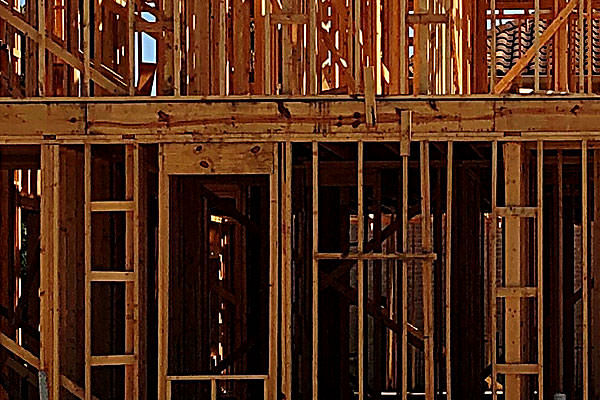
Converting a garage into a granny flat can be an affordable option – after all, it is already a building that has been assembled with four walls, a roof, a solid floor and a foundation.
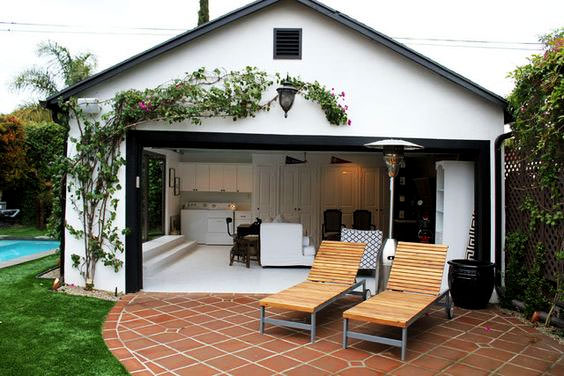
Source: Wilder Outdoor Spaces
Sit back and learn below how conversions are done best…
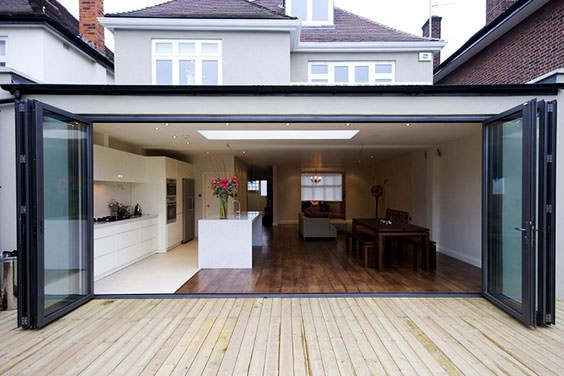
Cost to Convert a Double Garage into a Granny Flat
A conversion requires the garage to be made more homely, and fit to live in.
Attached granny flats can be easy conversions, as most councils are happy with these.
The price of this will vary depending on the:
- Size of your garage, and
- Amount of modifications and repairs required.
Essentially, the bigger your garage and more complex your design, the more it will cost.
To use as a guideline, the standard size of a double garage is 36sqm, with a door that is 5.2m wide.
First, let’s not forget your initial approval costs:
- Surveyors Report – When I built my granny flat, this cost $1400. This may not be required (depending on your local council).
- Designer, including BASIX Certificate – This can vary greatly, but a great designer is important for your conversion. As their profit margins tend to be smaller, you may find that they will charge more per square metre.
You will see this happen with your tradies as well. But, back to the subject at hand. For a great architect, expect to pay up to $2100+. However you can find a draftsperson for much less than this.
- Engineers Report – This can set you back up to $1500.
- Final Approval (the Occupation Certificate) – It can cost you another $1700 to have your certifier come out and hand you this Certificate.
The total cost for approval adds up to $6700.
Below are costs to consider:
- Heating & Cooling – $1300 – $2100.
- Plumbing & Sewerage – $1600 +.
- Electricity – $400 – $600.
- Storage cabinets – Cheaper stock cabinets will cost at least $1600 for a small kitchen.
- Drywall – Expect to spend over $2100, which includes installation (some areas will have pricier tradies).
- Paint – While you do not need to spend a small fortune on paint, $600 is a rough guess.
- Fixtures and Appliances – This covers everything including toilet/s, sinks, an oven, and lighting. A low-priced guess is $1900, but you could spend a lot more on luxurious items.
- Landscaping – Landscaping is vital, for you/your tenants’ privacy. Expect to pay up to $3100 to have a professional do this.
- Storage or Parking – Your garage was designed with an intention in mind. You may need to come up with something to take place of this:
- If the garage was being used for storage, you might be able to rearrange your shed, which will not cost you anything.
- If you were using it to park your car, you may need a concreter to give you a quote for a driveway.
Cost to Convert a Single Garage into a Granny Flat
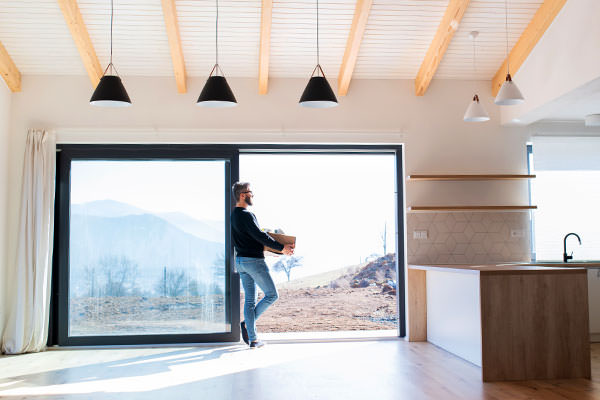
A standard single garage is roughly 21.6sqm, with a door that is 2.6m wide.

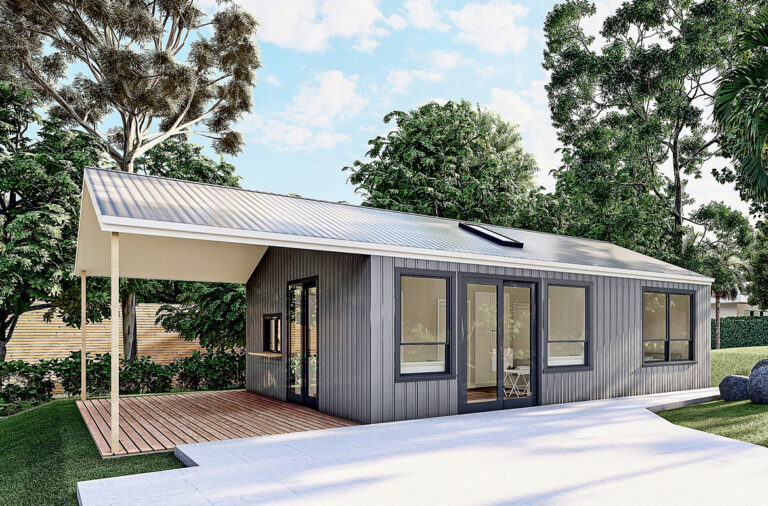
A single car garage can make a great studio granny flat
As mentioned above, before you even start building, the total cost to be approved can reach $6700.
Costs to be mindful of are:
- Heating and Cooling – $820 – $1300.
- Plumbing and Sewerage – $1000 or more.
- Electrical Work – $280 – $400.
- Cabinets for Storage – Even for a kitchenette, your less expensive stock cabinets will cost at least $1100.
- Drywall – Expect to pay over $1300 for a single-car garage.
- Paint – You do not need to spend all your hard-earned cash on paint, but it may set you back more than you thought. $350 is an approximation.
- Fixtures and Appliances – This is inclusive of everything from a toilet/s, sinks, an oven and lighting. A small estimation is $1100, but you could pay a lot more if you want luxurious items.
- Landscaping – Landscaping is critical, for privacy for you and your occupants. Be prepared to outlay up to $1900 for an expert to do this.
- Storage or Parking – Your garage was created for a purpose. You may need to come up with something to replace this:
- If you were using it for storage, you might be able to re-organise your shed, which will not cost anything.
- If you were using it for parking, you may need a quote from a concreter for a driveway, for somewhere to park your car.
These prices add up to, on average, $8200 – $8800 for converting a single garage into a granny flat.
Taking into consideration your approval costs, these range from $14,900 – $15,500.
What Needs to be Done in Order to Convert a Garage
Below is a step-by-step process to convert your garage to a granny flat.
#1 – CERTIFICATES
You may need several Certificates when converting your garage. Again, this is depending on your local council. As they all have different rules, be sure to give them a call and they will direct you to the certificates you need.
As an example i’ll share the process required for my local council:
Before planning the conversion, the most important Certificates to get are:
- Section 10.7 Certificate – This will let you know whether you can build on your property, or any limitations that apply. It will also advise you whether your land complies with the SEPP, thus, how you can gain approval.
- Land and Title Search – This will verify your properties boundaries. Your Council or private certifier will ask for this before they give you a Construction Certificate (which essentially grants you permission to build).
- Owner Builder Permit – You will have to pass a course, either online or in person, and obtain your “white-card”. This post about building a granny flat explains how to do so.
- Stamped Design Plans – Either an architect or drafter can design you construction ready plans for your garage conversion, that will then be inspected by a certifier. The certifier must give them their seal of approval, so hiring a good designer is important. Converting a garage is extremely different than designing a larger granny flat from scratch. With a conversion, you must fit all the same elements into a space that is often half the size. Hiring an inexperienced designer could end up costing you if they don’t know your Councils’ regulations. This is risky, so be sure to look for a great designer.
- Stamped Engineering Plans – An Engineer will need to come to your site and perform soil tests. These plans will also need to be approved by a certifier. They will certify whether your existing slab and frame complies with the Building Code of Australia (BCA), or will have to be redone.
See, most garages are built on a concrete slab. But the building codes are not the same for garages as they are for habitable spaces. So, at times, the slab in your garage may not be thick enough, or strong enough.
- Approval from Your Water Supplier – This varies, depending on your location. For example, your water company may be Sydney Water or Hunter Water. Regardless, you still require the appropriate approval, as this confirms:
- What impact your conversion will have on their system, and
- If further works must be undertaken to supply you with more water and sewer systems.
Your certifier may require this before they give you their approval, so I strongly suggest you make the call to your water company, gaining their approval.
#2- APPROVAL
Receive Conversion Approval (see below: “Does Council Need to be Involved for a Legal Conversion”, where I will extend on this).
#3 – BASIX
- A hot water system that is energy efficient.
- A new rainwater tank that allows for storm-water drainage, and
- Sufficient insulation.
# 4 – FLOOR DRAINS
- Concrete-saw the current slab to install the necessary plumbing.
OR
- Install a concrete floor in the bathroom that is elevated.
The perk of this is that the bathroom only requires a wall that is 2.1m high, rather than 2.4m high. So there is a strong possibility this can be possible, (In NSW anyway).
#5 – WATERPROOFING
#6 – ELECTRICAL WORK
#7 – THE FINAL TOUCHES
This includes installing:
- The kitchen – Including having the electrician return to hard-wire a smoke alarm to the electrical system.
- Internal linings and floor coverings.
- Finishes, such as lighting and painting.
#8 – TERMITE RESISTANCE
Your slab must be checked for termite resistance, and before laying more concrete down it is strongly advised you have the area sprayed before the new concrete is laid.
#9 – THE OCCUPATION CERTIFICATE
Once you have finished the conversion, one final certificate is required – an Occupation Certificate. An inspection must be arranged with your certifier, which you must pass so they give you this Certificate before anyone starts living in your new granny flat.
This Certificate states that your building is legally safe and suitable to be occupied.
How to Create an Entrance
As mentioned, a detached garage will typically have a door that ranges from 2.6m – 5.2m wide.
If you are converting garage with a large, overhead, manual or electric door, this will need to be replaced and a new “homely” door, that makes it more “livable”.
How, you ask? See below.
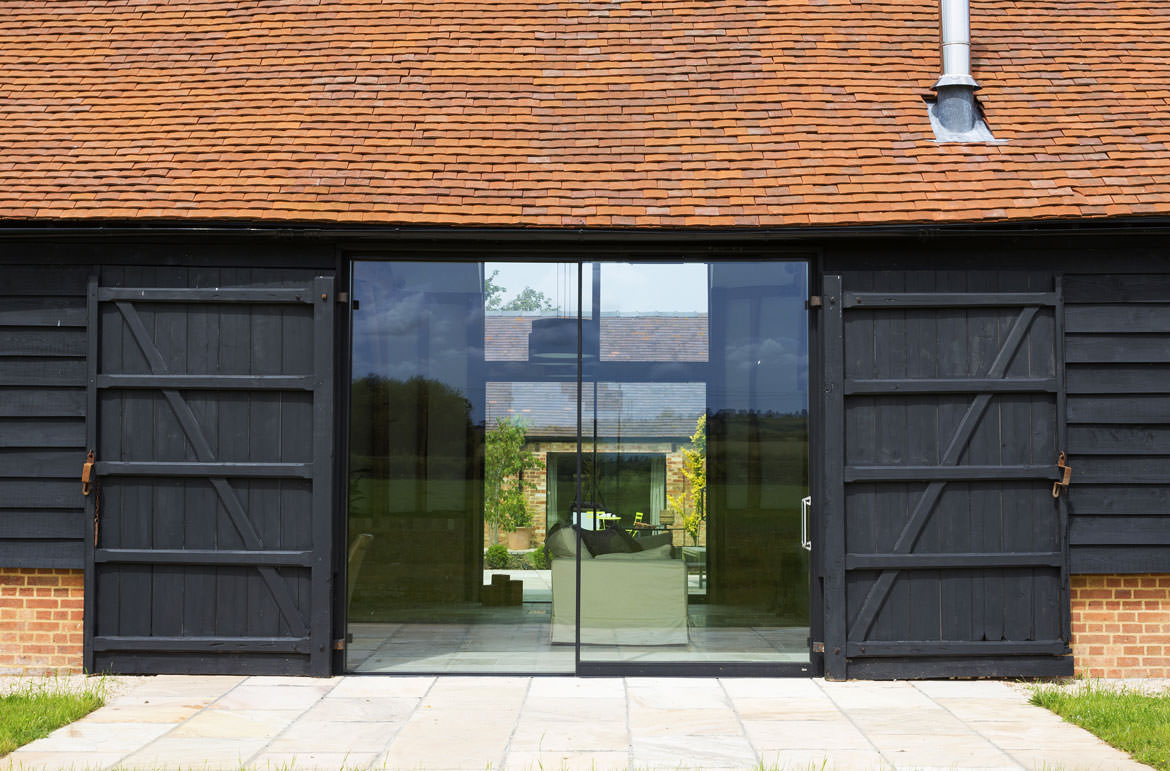
Replacing an Overhead Garage Door
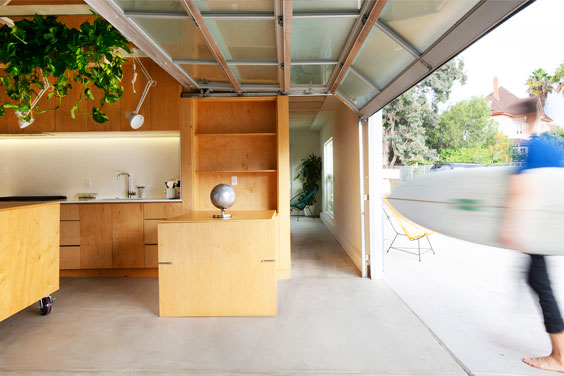
You can remove the existing garage door, replacing it with your choice of door (i.e. double door, sliding door, etc.), remodeling the interior completely.
A glass sliding door is the most common replacement for the entrance way
*It‘s important to note that, when I talk about replacing this door, I do so with it framed as a non-load bearing wall. Most external doors will need a load-bearing header placed right above the jamb, as:
To support a larger door opening extra framing support is required
- Headers are structural framing members made out of doubled lumbar, and connect the rough opening of the door, distributing the overhead weight that, without them, would fall on the missing studs.
Now, a step-by-step process to replacing the door and installing a sliding:
- Take off the door-opener mechanism, including the tracks, chains, and motor.
- Remove the current garage door – To dismantle the door, unscrew the panels individually, working from the top to the bottom. Leave the structural framing in place, to support the load.
- Construct a secondary wall on the inside of the framed opening – This defines the rough opening, houses your new door, provides a place that surrounds the sides of the new door, a surface for nailing wallboard and sheathing.
- Decide where you are placing your new door – Take some measurements, centering the door in the opening. Use a chalk line on the floor to guide where you’re going to place the door.
- Build a frame around the door – Build a sill plate, and a bottom plate. Place studs in the middle, roughly 40cm apart. Ensure you build plumb and square, ensuring no studs are bowed.
- Anchor the Wall – Use concrete screws to secure the walls’ sill plate to the slab.
- Install Insulation – Nail rigid sheets of foam insulation with a moisture barrier over the face of the frame. This helps to protect the door from moisture.
- Fasten the Top Plate – Cut the plate, which will lengthen the opening and let you place studs on each side of the door, fastening it to the ceiling joists.
- Start Placing the Door – Apply beads of sealant across the bottom of the opening.
- Finish Placing the Door – Now insert the door from the outside (this will require at least 2 people). Do not slide it into place as this will mess up the sealant beads. Rather, tilt it into place, then making any adjustments.
- Frame the Sides – Place studs, cut to fit in the middle of the sill and the top plate, which will frame the sides of the rough opening.
- Nail and Screw – Hammer 1 x 10d finish nail or 3-inch screws into the middle section of each hinge jamb, amongst the framing studs.
- Plumb and Square the Jamb – Use nails or screws to hold the door in place, and shims if necessary, between the jamb and the studs, and other areas if needed to square the opening.
- Confirm Square – Measure the diagonals of the jamb corner-to-corner (X-patterned), checking they match.
- Check to ensure the door opens and closes correctly.
- Continue to fasten the jamb to the frame with nails and screws.
- Add Finishing touches – All new doors need:
- The edges and gaps insulated and sealed with spray foam and caulk.
- Adhesive sealant applied to the bottom of the rough opening.
- A coat of paint and some wall-mounted light fixtures.
*Please note – Refer to your manufacturer’s instructions as to how to install your door, as methods change between models. This is just a general guideline.
Does Council Need to be Involved for a Legal Conversion
Basically, as long as your property meets all the necessary regulations for you to convert your garage, this can be approved through the SEPP.
If so, you can be approved through Complying Development (CDC) – meaning, there is no need to get Council involved.
The regulations that you must meet include:
- Your land is 450sqm or more.
- Your garage is under 60sqm.
- You don’t have another granny flat on your property.
When designing your conversion, it is also important to note that you must keep the internal wall height of the living area and all bedrooms 2.4m or more. If your roof is a cathedral or skillion, you must base this off the average wall-height.
As is the case with every granny flat, your local Council may have their own regulations.
So, I strongly suggest giving them a call, and asking their advice on what you can/cannot do, and what products you can/cannot use.
Are the Rules the Same Whether it is a Detached or Attached Garage?
Straight-up, no.
The main difference is:
- The attached granny flat cannot have an interior door – it must have its own separate entrance.
Detached granny flat conversions also have their pros and cons over attached granny flat conversions.
Do Companies Exist That Will Sell You a “Conversion Kit” With the Materials You Need
Unfortunately, it’s not that easy.
As the regulations change between Councils’, so does:
- Exactly what you can/cannot use, and
- Exactly what you will require, depending on
What you already have, and where you live.
What is a Class 2 Building, and Can This Be Converted?
A Class 2 Building is an example of why it is not that easy for companies to just sell conversion kits.
A building is classified as Class 2 if the garage is on the ground floor of a main home, and living area is on the top of the garage.
Class 2 Buildings have different regulations. You can compare them to apartments, as the living area is on top of the garage, and this makes it very hard for them to get approval.
Amongst other things, they must be fire rated on the ceiling of the garage conversion, and on the floor of the living space that is upstairs also. They must have escape routes upstairs, be disability rated (see this article which explains the disabled access requirements), and more.
Not to mention, your pool of certifiers, engineers, designers and builders that you have available to use also shrinks, as not all are able to work on Class 2 buildings. These people need to be registered under the Registration, having had at least 5 years of experience in the relevant industry.
Other requirements that your certifier, engineer, designer and builders must meet can be seen in this article I found.
Can You Convert a Shed into A Granny Flat?
Yes – just like a garage conversion, converting your shed is another common DIY option for building a granny flat.
If you have an old shed in your backyard that you are no longer using, consider converting this instead of your garage. See “Can You Build Your Own Granny Flat?” for information on how to obtain an “owner-builder” license, before you start building.
Keep in mind these common problems to watch out for:
- Each Council has different regulations – Be sure to check your Councils’ rules first. Whilst building a granny flat from a shed is not disallowed, there are certain standards and legal requirements you must meet.
- Particularly important will be:
- The size of your shed.
- The considerable modifications that you must make to your shed, in order to transform it from what is classified as a non-habitable building, to an area that is deemed fit to occupy.
- Particularly important will be:
- You will probably require a floor plan – As you will need a bedroom, living room, kitchen/kitchenette, and bathroom, more than one window, and will have to replace the wide doors.
Do not let this alarm you – what it costs to convert a granny flat into a shed is very similar to the affordable price of converting a garage, as a shed is already built, so you only need to make it habitable.
Garage to Granny Flat Inspiration Ideas
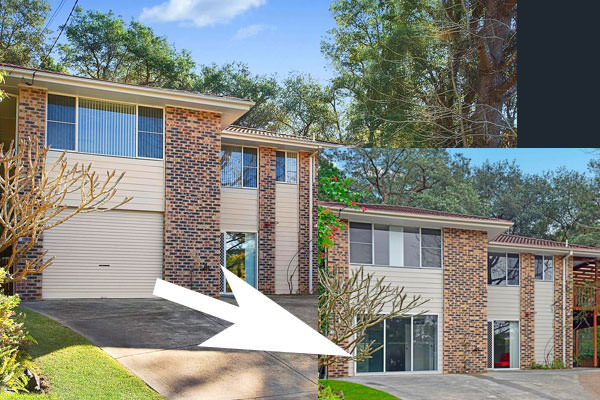
The pictures in this gallery by Garage Conversion also show a once shabby garage converted into a 2-storey granny flat.
Source: AM Builders
Source: UR Design Mag

Source: Houzz
Conclusion
Even the most rundown garages can look incredible when converted using a great designer.
If still undecided, “Granny Flat vs. Extension – What Makes More Sense?” may help.
Otherwise find out more about DIY’ing your own granny flat.

About Me
I built my own Granny Flat from scratch. This blog was created to share everything I learned along the way and to answer common questions. I hope it helps you build your own granny flat as well!