

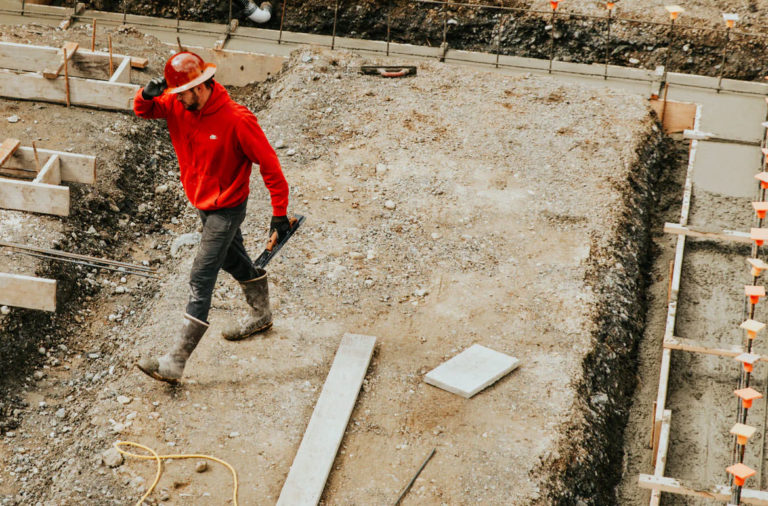
After finishing my granny flat, I’m happy to document the costs when people ask: How much does it cost to build a Granny Flat?
You can have a “kit granny flat” ordered, and it will cost you less than $50,000. Or for a large custom granny flat this will cost you $100,000 or more. My 2 bedroom Granny flat cost me $91,071.64 as an owner builder.
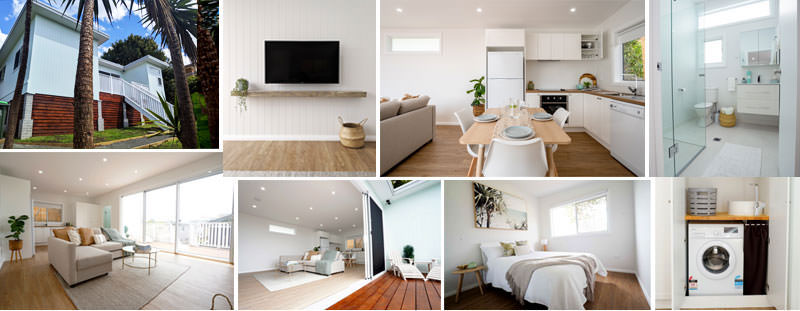
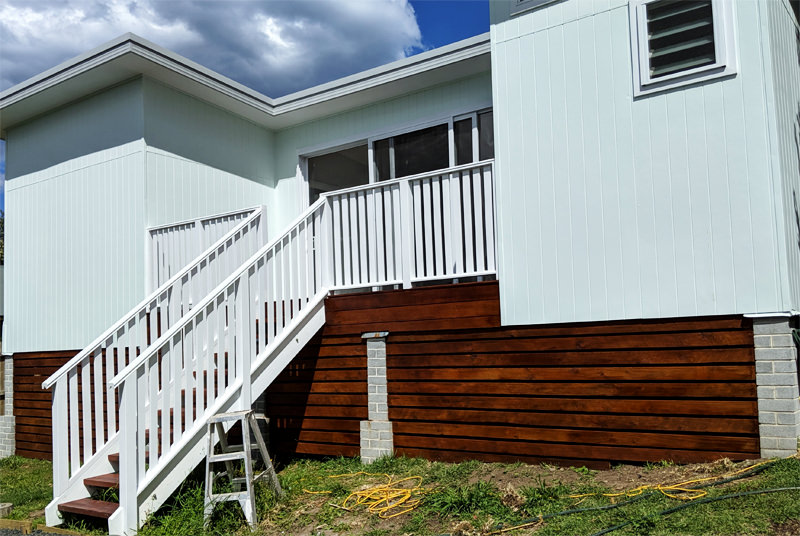
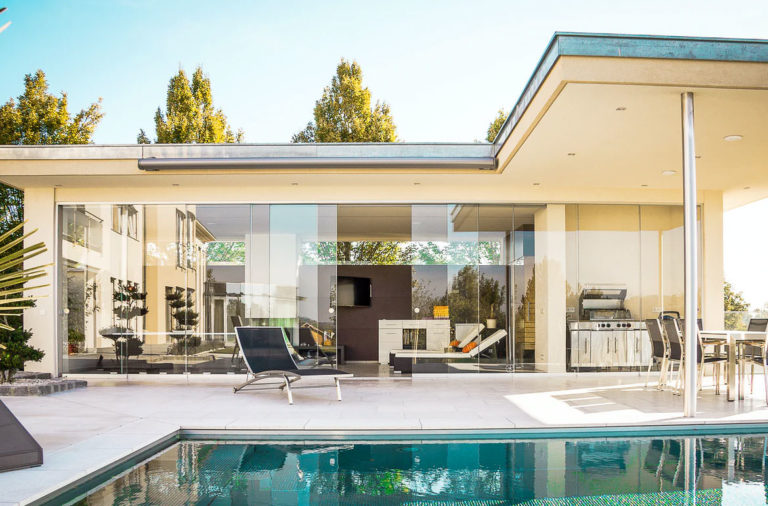
The Final Result
DON'T PAY A FORTUNE FOR YOUR GRANNY FLAT. Find out how to deal with council and build a granny flat for the lowest cost possible. Learn More.
In this guide, I am going to break down the exact expenses I paid to build this custom designed granny flat above as an “owner-builder”.
This Granny flat was the largest I could legally build in NSW.
The specifications of the build are:
- 60 sqm Internal Floorspace + 10 sqm Deck
- High Ceilings
- Custom Design/Plan
- Custom Kitchen + “Laundry” section
- Custom Window Sizes
- 2 Bedrooms
- 1 Bathroom
This does not include council fees and certification costs, which I will get to later in this article. I’ll let you know the costs for these as well.
NOTE:
There are cheaper options, such as getting a “kit granny flat” that I share in this article.
And you may be tempted to get a really cheap granny flat, but the result will be more like a small shed instead of a complete “mini-home”.
It is also important to note that my custom-built granny flat was:
- Built on piers
- On a sloping site.
- Including higher than the average 2.4m high ceilings.
- Many custom sized windows and a huge stacking glass door
- Including a Merbau timber deck.
All these points above add cost to a basic 2-bedroom granny flat.
But I am thrilled with the end result.
And it is likely if you don’t opt for the “pricey” things above it will cost you much less.
For instance; If you build a design featuring:
- Less rooms or
- Lower ceilings
- Choosing a cheaper kitchen
- Building on a concrete slab and
- Using cheaper finishes.
it will undoubtedly cost you much less than my expenses broken down below.
Cost Breakdown for a Granny Flat
There are a few stages to building I wanted to break down to explain the costs:
- Surveyors report
- Cost for planning (design)
- Cost for Engineering diagrams and Engineers advice (if required)
- Cost for Certifier (either council or Private)
- Costs for Materials
- Costs for Labour (If you outsource this)
- Costs for Trades, (Electrician, Plumber, etc)
When building my granny flat I recorded every cost that went into it. And kept a clear expense account as I progressed with the build.
So let’s jump right into it, so I can share the breakdown.
1. Surveyors Report Cost
Before you can do anything, you need to get a survey report. This is where a surveyor will come to your land and make measurements to confirm the land boundaries.
They also take heights from many points on your land based on the AHD (Australian Height Datum), which is based on sea level. This is required to confirm the height of your granny flat from ground level. (very important from council’s perspective)
This cost me $1300.
2. Costs for Plans/Design
Regarding costs for planning, I paid $1,700 for construction ready plans.
These plans were detailed enough to be issued with a construction certificate (so I could start the physical build). However, this should have cost me less.
Being a complete novice at this stage, I went ahead with just one quote.
I quickly learned that I need to get at least 3 quotes for anything.
You should be able to give your drafts-person (or architect) your Survey report of your land and your engineering diagram so they can get to work creating construction ready plans.
It is worth noting that architects will (by in large) charge you more for your plans than drafts people. Higher education/qualifications in the field equals more money in fees.
3. Engineers Report
This covers a soil test (if you are building on piers) so they can indicate how large your concrete footings need to be.
Or confirm the concrete slab details, such as reinforcement and perhaps the strength of concrete required.
And they will also indicate (based on your designs/plans) how many bearers and joists you need and how far apart each pier needs to be.
Here is my report and the diagram which indicates where the piers needed to be positioned.
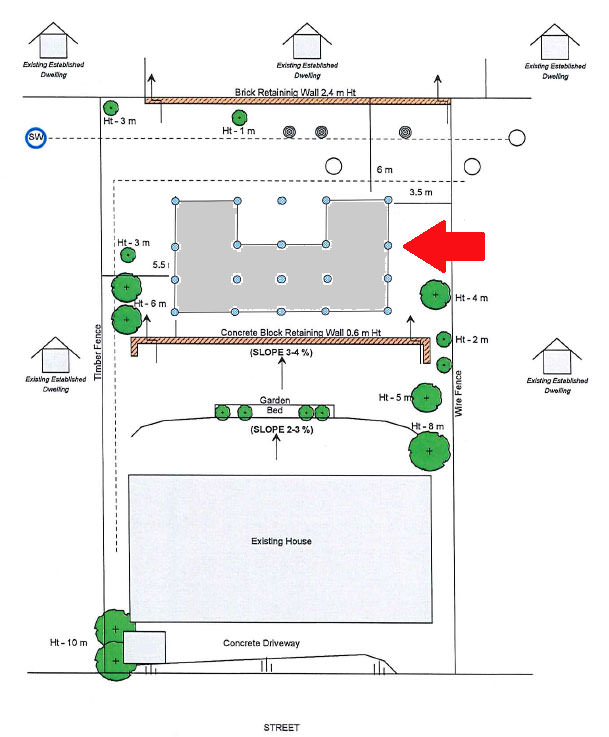
This engineering diagram shows the exact location of the granny flat
The red arrow in the picture above shows the proposed position of the secondary dwelling. And the number of piers required. (The blue circles)
4. Certifier Costs
You will need a certifier to approve your plans before being issued a construction certificate.
If you want to see all the council requirements needed before you begin, please see this article.
I went with a private certifier vs. a council certifier.
This cost me $1600, and are certainly more expensive than using a local council certifier.
The reason I decided to pay more was that a private certifier (generally) will be quicker to answer questions you have. And quicker to do the necessary inspections during the build.
You have to schedule the main inspections along the way with my private certifier, I was able to book in inspections with just 1 days notice.
I have heard this isn’t possible when using council certifiers.
I wanted to limit being held up during the build, so I choose the private route.
5. Cost of Building Materials
The biggest expense will be here – The Materials.
The main material costs for my granny flat came to: $57,913
I have added a quick screenshot for the 10 main material costs below. From highest to lowest. (I didn’t include every single material as this was quite a long list.)
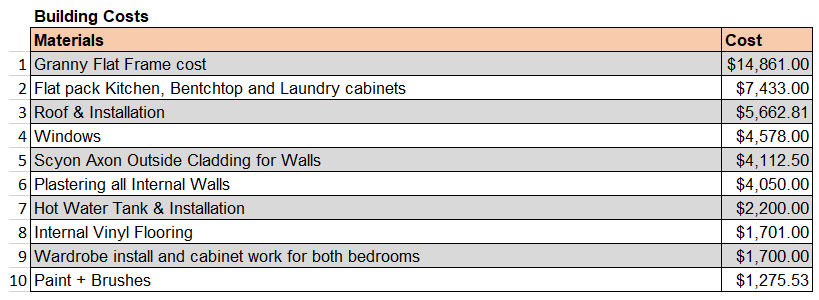
The most expensive material costs from highest to lowest
As mentioned I recorded every cost, including Screws, builders string, pain rollers, etc. The costs for all these “smaller” items was not included in the main material costs.
There are strict rules about constructing any dwelling in Australia and some of these rules are about using old and new materials.
NOTE: New materials vs used materials are needed for brand new constructions. This is stated within the Building Code of Australia.
That doesn’t mean you can’t decorate for a lot less than people might think.
For instance, going to a “recycle timber yard” meant we found this great piece of weathered timber for $80.
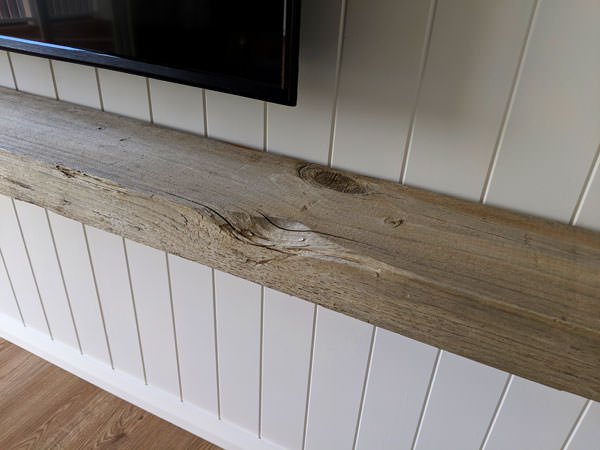
A recycling timber yard offers great pieces for a lot less
6. Cost of Labour
As an owner builder this is where you can save a lot.
However, it is wise to balance what you feel confident doing, (or want to do) and what you feel higher skilled people should do.
My uncle; a qualified brick layer, laid these brick piers for me. And I am eternally grateful for his help with this.
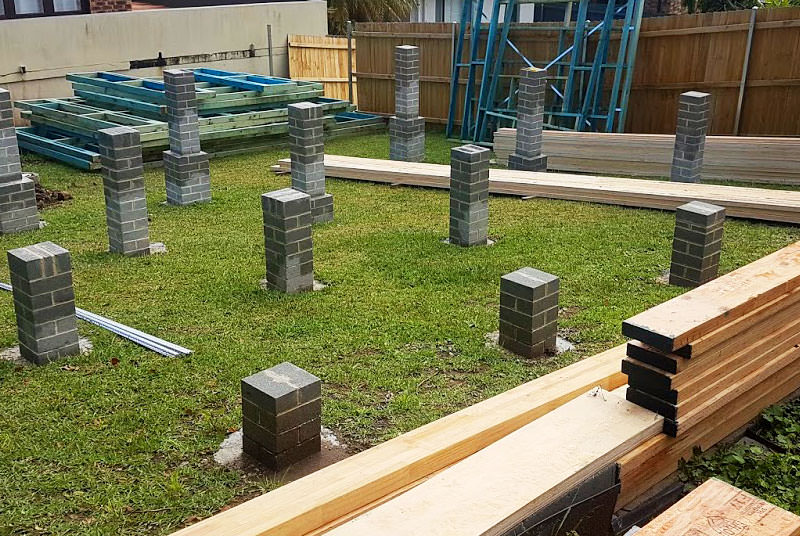
Piers ready to go. Foundation all set. $866 worth of bricks shown above
If you don’t know my story I had never built anything before; but surprisingly with guidance from the right people I was able to:
Lay the bearers, joists and floor myself (with the help of friends for the heavy lifting part)
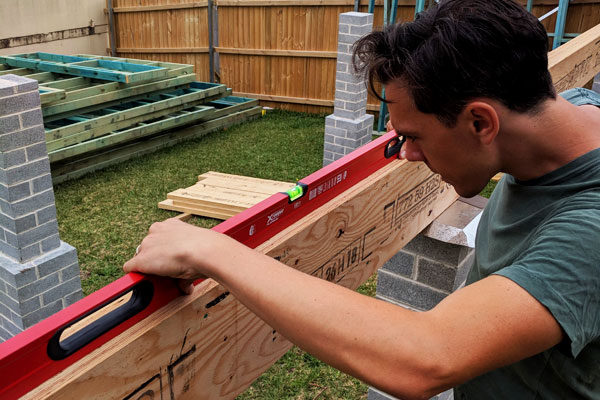
This is surprisingly easy to do
As well as laying the tongue and groove flooring pieces down as well:
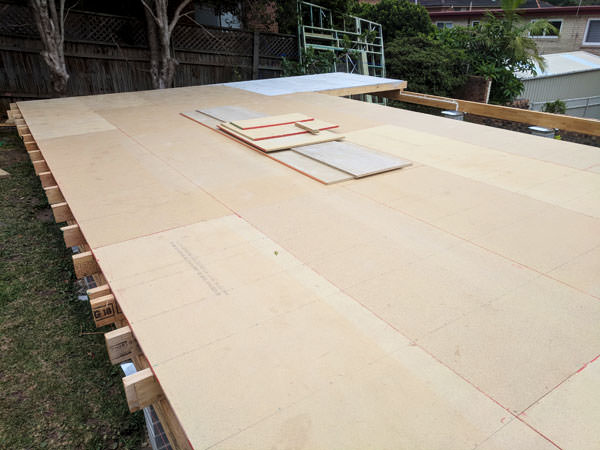
Tongue and Groove flooring pieces were also easy to install
However, I hired builders (2 builders working together and paid them per hour) for raising the frame and installing the rafters. (We had a skillion roof design).
The cost for all this work above came down to $1700 for the builders to put up the frame and rafters for me, including ensuring everything was square and plumb.
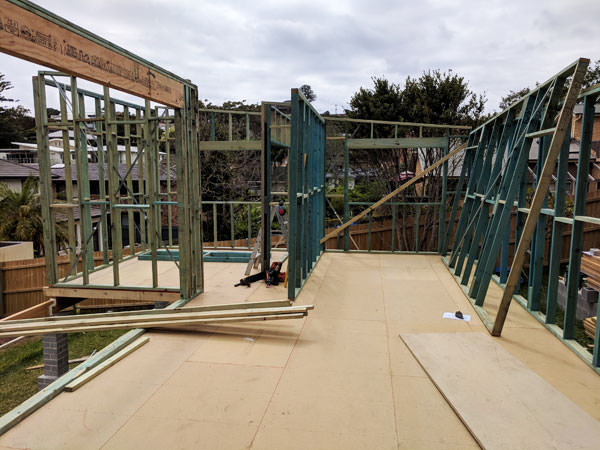
Frame being erected ready for roof rafters
I had a roofer come in to do the roof. (They charge a lot for labour it seems).
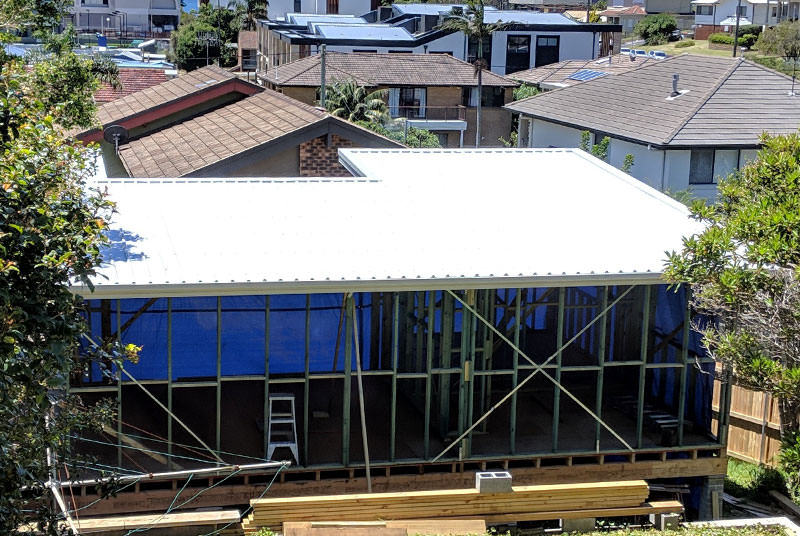
Roof, fascia and gutter all fitted
As I wanted a colorbond roof, I went to a local metal fabricator who works with Colorbond metals.
And they gave me a quote for $1690 for all the materials.
I was unsure about putting the roof on (as I had never done this before) plus bad weather was on the horizon!
So I hired a roofer to do this, I know he purchased the roofing materials from the same location I received the material’s quote, however the total cost of materials + labour came to: $5662.81.
Yes, that difference in price (around $4,000) was the labour cost for 2 people over 2 days of work.
As you can see the cost of labour was huge for the roofer! If you feel confident doing this, you will save a lot here.
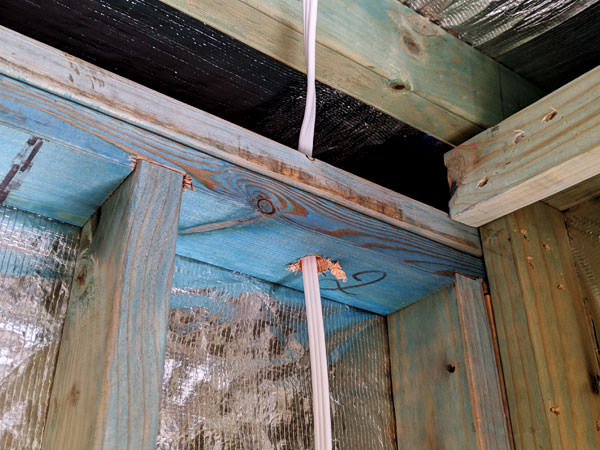
I also had the builders install the windows, and the cladding. I used James Hardy cladding sheets and they were a lot heavier than I thought.
The cost of labour for the builders to put on the cladding, put in the windows and the eave sheets came to a few days of work for both of them and this cost $5393 in labour.
All cladding installed and windows fitted
7. Cost of Trades
There are two main trades you will need and they are:
- Electrician
- Plumber
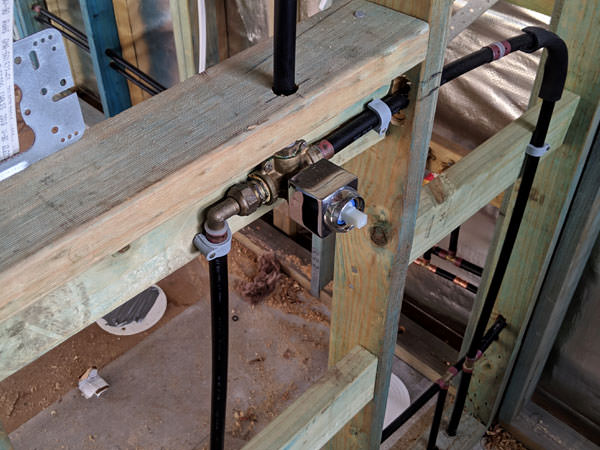
Electrician’s Work
The electrician will work in 2 main stages:
- They will be on site once the frame is up, and install the wiring and the connection to your main source of power. (From the main house in most cases).
The electrician first fits all the wiring before the walls are plastered
- They will come back on site once you are close to finishing, to install the lights, switches, etc and finalise the separate metre or electricity box to your granny flat.
The electrician cost me $6250 for all this work combined.
However, I understand that most places are different, in terms of how far the granny flat is from the street, how many lights you want, fans, switches, power points etc.
These individual requests will alter the quote a lot.
I was also busy with other work to be able to dig the necessary ditches for the cables to lead to the granny flat.
So I hired a person using Airtasker to dig a 30m long ditch 60cm deep. This labour cost me $250 (shown below).
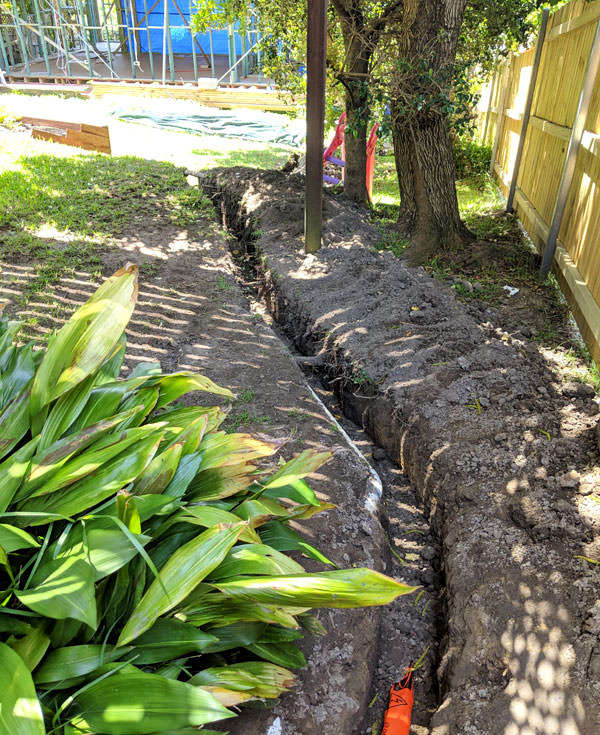
Ditch dug for electricity connection
As a side note, reaching out for labour on Airtasker.com can be a great idea for locals to get a little extra money and save you a lot of time.
Plumbing Work
This is where I admittedly lost money and it should have been cheaper.
A great plumber who helped with odd jobs around our house (a local) was more than keen for the work. Being someone I could trust with the work, I didn’t bother getting quotes…
This ended up being a mistake.
I left him to his own devices at an hourly rate to do what he wanted when he wanted. Which would have been fine, only that the final bill was $10,903.60 which was more than I had budget for and expected.
Plumbing work is also completed in stages. Your plumber will know when to come back on site.
And speaking to other plumbers after all was done, this was certainly too high, as this didn’t include the hot water tank and installation of it either. I was told for the work completed it shouldn’t have been over $7,000.
Total Building Cost
To make it easier to see, I have included all the main costs in the chart below:
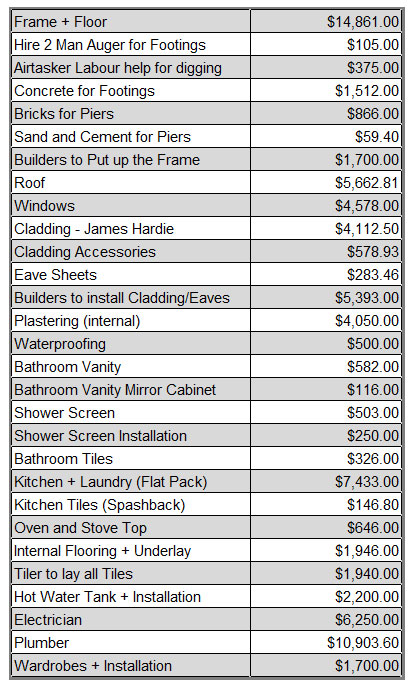
SUMMARY: The total main costs
There are extra smaller costs as mentioned with this build, however these shown above are the majority.
Extra Costs
There are other costs not mentioned in the table above, and although individually they were not huge, they do add up to a substantial number.
For example, hiring a “Skip Bin” to get rid of the building material mess. This was $335.
Buying handles for the kitchen cabinets, door knobs, buying glue, silicon, nails, etc, these all add up as well.
What my wife and I found worked best, was to list each room and write down what that room needed.
For example:
Bathroom Needs:
- Toilet
- Shower screen
- Vanity
- Mirror
- Towel rack
- Toilet Roll Holder
- Waterproofing
- Tiles
- Fan
- Shower Head
- Taps
- Hand Towel rack
- Drain Grates
Then after you have this list you set a budget for every room and allocate funds to each item on your list.
You will soon start questioning; “do I really need to spend $400 on a shower head?”
The answer is; No you don’t.
So perhaps you want to take the money saved on a shower head and get a bigger vanity mirror for example.
Listing out what materials are needed like this, you soon realise that bedrooms don’t have a long list of “things” required either.
And kitchens are easier than you think. When getting a flat packed kitchen, from Ikea or Kaboodle (Which by the way are cheaper than the Polytec Australian made kitchen I purchased). It will include most of what you need, apart from the appliances that is.
Certification and Council Costs
I wanted to show you the costs I had regarding certificates and council:
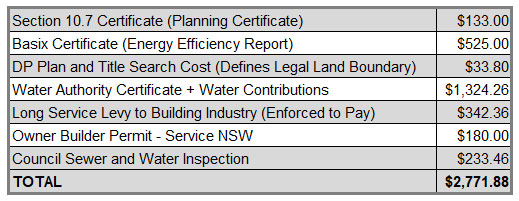
List of my certification costs
As you can see before being granted a “certificate of occupation” once everything was done I had spent over $2,500.
These were costs I could not escape from.
Even though they didn’t make the most sense, such as paying money for a builder’s long service levy, even though I was the owner-builder and won’t be benefiting from that in anyway.
It also isn’t clear on exactly how they come to these costs.
Or why you would need to pay for a title search after paying for a surveyor?
Now, you may not need to spend as much as me. Depending on your local council there are different fees and “contributions” you must pay.
It is also important to note that some councils will charge you added contribution costs. And unfortunately, this is just bad luck. For instance, if we lived in the next council district across, we would have to pay a further $9,000 in council contributions.
You won’t see any personal benefit from this contribution to your granny flat. It is just a cost instated by that particular council. It is also important to know that these council and certification costs may not be included when you hire a building company to build the whole granny flat for you.
A professional building company could tell you; it is up to (the owner) to cover these costs and are not included in packages they offer.
Landscaping Costs
I only set aside $1000 for landscaping, and this was low.
However I’m happy to say that I was able to meet that target easily.
Having this limitation placed on myself I had to look outside the box to buy the things I needed.
It may look like this work cost a lot, but it didn’t.
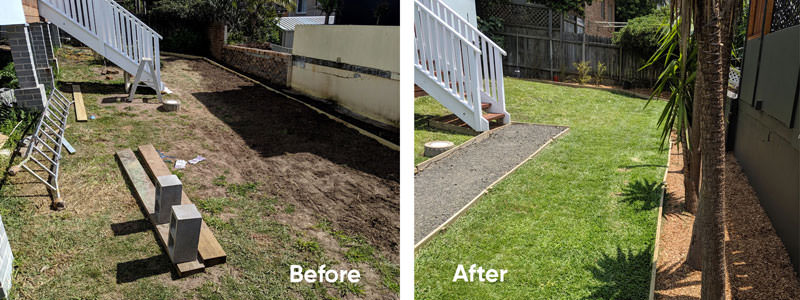
Before and After Landscaping was complete
I spent less than $100 on paint for the back wall, after scraping off the old cement render.
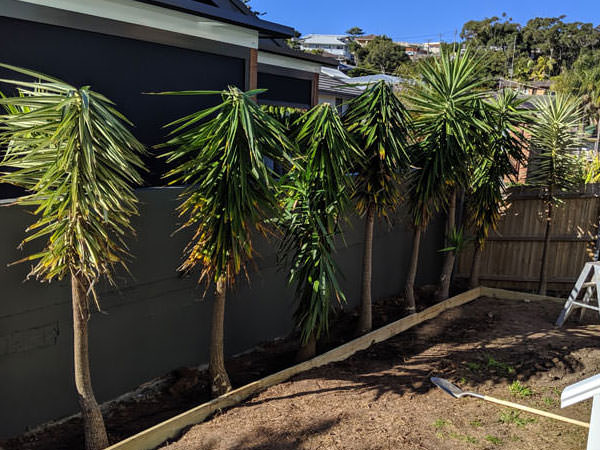
The Yucca’s against the back wall fit perfectly and cost me $0.
Coming up to a year since being planted I’m glad to see they are still thriving.
By going to “Facebook Market Place” I found a person who lived a couple of suburbs away and said I could have them for free as long as I dug them out myself.

Plants on Facebook Marketplace are cheap – if not free 🙂
So the biggest “catch” again is doing the labour yourself or hiring someone on Airtasker.
But I must say there are fantastic bargains on Facebook market place.
Landscaping is a breeze when thinking outside the box
In most cases people just want plants, timber and other things gone. That is why most things are so cheap. If you Google “Facebook market place” click on the first search result you can find a lot of what you need nearby.

However, jumping onto Airtasker and posting a job for someone to do that for you would still save you a lot of money.
The grass you see above was all just planted from seed I bought on eBay for $77.
The downside was that I had to water it most days and wait 6 weeks!
The other option would have been to buy the turf and lay it myself, however for my space this would have cost more than $550.
The “gravel” was the cheapest road base that could be purchased from a local business.
And I purchased H4 timber from Bunnings for the frame around the plants and to frame out the path leading to the granny flat entrance. This Cost me $324.
Another tip, is just call up local tree trimmers in your area and ask them to dump a big lot of wood chip on your drive way for landscaping. They have to pay to have this removed, so will jump at the chance to leave a whole lot of it at your place without costing them anything!
Owner Builder vs. Building Company
We were quoted by 3 local building companies $140,000+ for this build.
And I am sure it would have cost more than this.
As during the build, we made changes to window sizes and a few other smaller things.
One greater benefit of being in complete control of the build is you can make these changes without paying extra that traditional companies charge. You will notice in a contract you sign with a granny flat building company there will be a clause that charges you more for any changes along the way.
The tricky thing is you don’t notice these subtle changes you want to make, until you are progressing with the build.
Which is a benefit of project managing everything as an owner-builder.
Conclusion
I hope this post was able to highlight the costs involved with building a granny flat.
As mentioned, every circumstance, every block of land and choice of material for building is different. But I hope sharing my personal experience will shed some light on this topic for you.
By being mindful of the main costs listed in the chart above and not going over budget for each of them, you will be pleasantly surprised how much you can save. Again, these costs would be less if I was more inclined to do even more of the labour than I did, and if I picked cheaper material and design options.
However, the downside is it will most likely take you longer than a professional building company, so it is important to keep this in mind.
However, the flip side is that is it very rewarding to build something yourself and see the fruits of your labour come to life.
It is nice to see your backyard every day and know you created something that was once just a thought in your mind. 😊

About Me
I built my own Granny Flat from scratch. This blog was created to share everything I learned along the way and to answer common questions. I hope it helps you build your own granny flat as well!