


When it comes to a building a quality granny flat – can a granny flat be built on bearers and joists like a house?
With a doubt – yes. Bearers and joists are huge pieces of timber that are used underneath a granny flat when building on piers.
In this article I will cover:
DON'T PAY A FORTUNE FOR YOUR GRANNY FLAT. Find out how to deal with council and build a granny flat for the lowest cost possible. Learn More.
- What LVL bearers and joists are
- How long bearers and joists need to be.
- How to lay bearers and joists.
- How are bearers and joists fixed together?
- What to do if the piers are out of alignment.
- What happens after the bearers and joists are laid.
- The spans required (spacing) between your joists.
To not waste any time, let’s get started on discussing all the fine details of every one of these points.
What Are LVL Bearers and Joists?
LVL (Laminated Veneer Lumber) bearers and joists are thin pieces of wood that are sliced off from a tree, and then glued together.
LVL beams – A close up
Just as you would with your standard, large bits of timber, you can also use LVL bearers and joists as the foundation for your granny flat if you are building on piers.
The main reason for LVL bearers and joists is that they are made dead straight. This means that you do not have to worry about any knots in the wood, that you tend to get with one core solid hard and huge piece of timber.
Laying the bearer on a pier
Bunnings’ has a large range of LVL’s available for purchase, in a range of sizes to suit your needs, up to 13.2m.
The benefits of these include that they are:
- Treated with a termite protection.
- Lightweight, with a great percentage of strength-to-weight.
- Strong, supportive, and stable.
- Environmentally sustainable.
The brand WesBeam is also Australian made with wood obtained in Western Australia and manufactured in Perth.
The SmartFrame brand allows for a free design service, where you can have your holes drilled as requested.
How Long and Thick do Bearers and Joists Need to Be
The precise length and width of your bearers and joists will be dictated by your engineer.
The drawings they do contain these instructions, to ensure that your granny flat:
- Is able to be built in a way that is suited to the condition and foundation of your land.
- Will be designed in a way that is structurally safe, strong, functional, compliant, and long-lasting.
- Will withstand all the pressures and stresses that it will undergo over its’ lifetime (i.e. the state of the climate and being utilised by people).
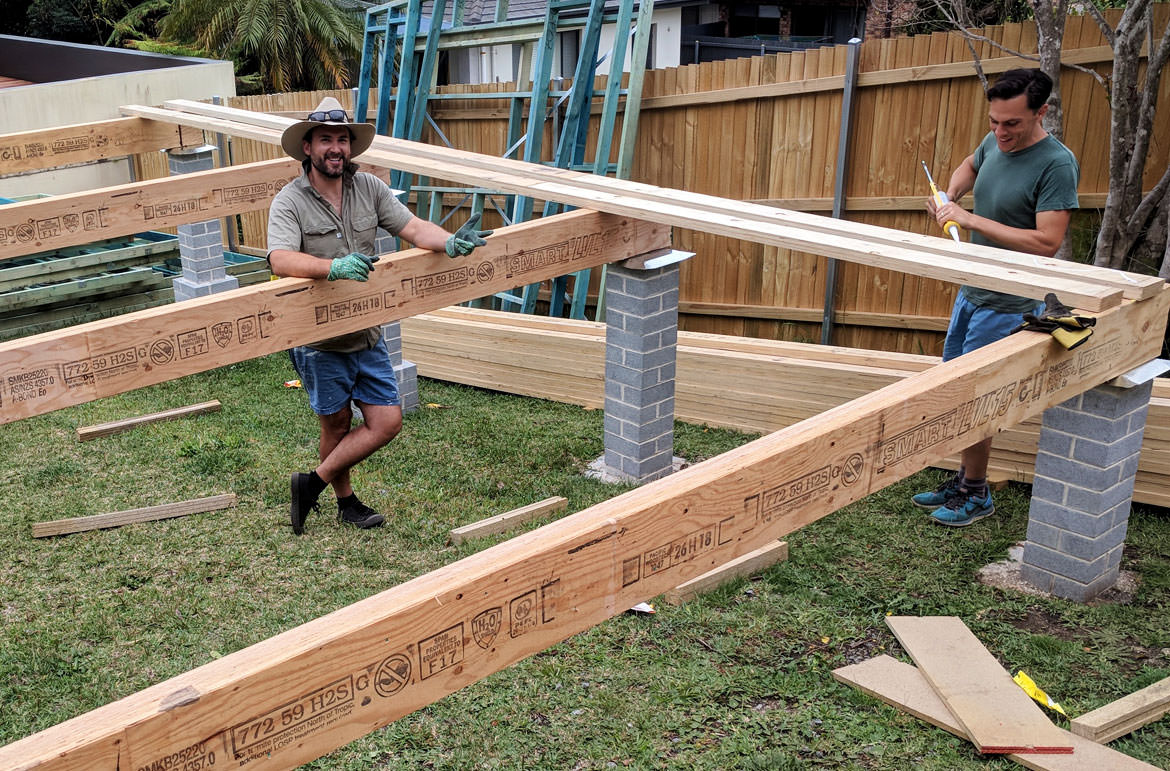
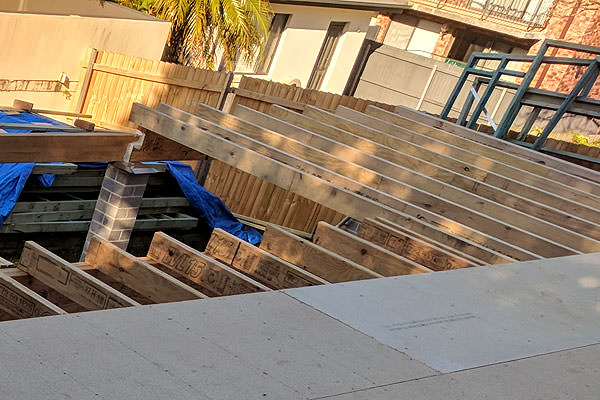
How to Lay Bearers and Joists
First, you need to mark out on your land the location of the granny flat, so you know where to place your foundation.
Now, you are ready to lay your bearers and joists.
This great video will show you step-by-step exactly how to install them, including what tools and materials you will need.
But basically, here is the summary:
- If you need to put 2 LVL’s together (as per your engineers drawings specifications), lay 2 out, applying construction adhesive across the full length of the beam.
- Roll the other timber over, moving the top one around, spreading the glue around.
- Make sure that both surfaces across the face are flush with each other.
- Put a sequence of double nails through them, checking the top surface while nailing to make sure it’s flush.
- Put malthoid in between the brickwork and the timber. A moisture barrier, this protects this area. Cut them into big pieces, ensuring they fully cover all of the brickwork – if not, moisture can get through the unprotected area.
- Lift the bearer into place, positioning it so it is not touching any of your brickwork. This is because brickwork can draw moisture in, and if it does, this can get in the timber. An air gap offers protection.
- Once the first bearer is positioned, follow the same sequence, putting the remaining bearers into place, using the same principle above.
- When all bearers are in position, use a hoop iron embedded inside the brick pier behind the brick wall, nailing it down with some clouts on top and on the opposite face. This holds down your bearers, making them secure.
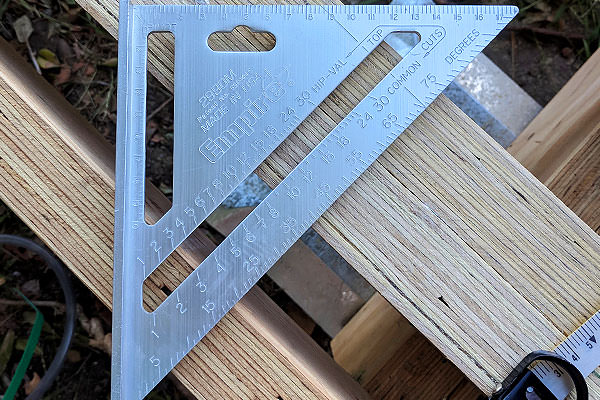
- Check all your bearers are aligned by putting your level on the bearers. If they aren’t, get your plastic packer and put it between the brick and the bearer.
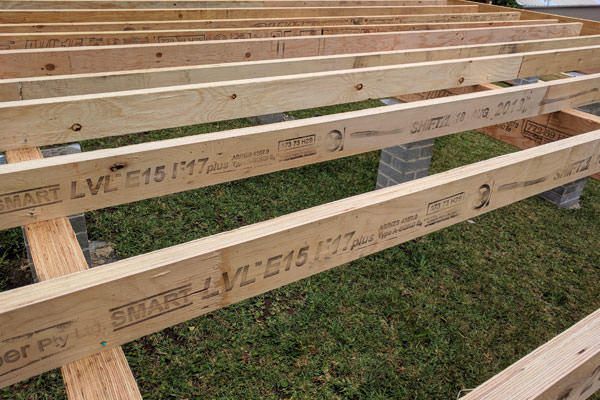
- You can now start laying your joists. Measure and set up where they must sit on your flooring. For example, if your pieces cannot reach the entire length of the floor (i.e. they are half the size of the flooring), stagger them from opposite ends, meeting them in the middle.
- Mark your lines an appropriate width apart that works with your floor sheeting.
- Pull your joist up to the edge of the bearer, sit it on your line, and nail both sides.
- Start laying the rest of your joists, following the same principle, and checking they are on the line you chalked in.
- When all your joists are nailed on top of your bearers, in between the joists you can put noggins in – this will reinforce the joist, helping to keep it upright.
- Finally, place a hoop iron that is encapsulated in the brick wall over the joist and bearer as well. Keeping it reasonably fit and tight, put another sequence of nails down to the bottom.
Now, your bearers and joists are ready for flooring.
How are Bearers and Joists Fixed Together
Generally, bearers and joists are simply just nailed together with a nail gun.
Something worth mentioning, though, is that you can potentially use far more nails than you may think.
When I built my granny flat, I used a pack of 3000 nails. It absolutely blew my mind that I used this many nails to fix the bearers and joists together, I definitely did not expect this.
What to Do if the Piers are Out of Alignment
If your piers are out of alignment, this means that some piers are higher than others.
This is quite common – you can never really get piers to the exact same height because bricks are a certain thickness.
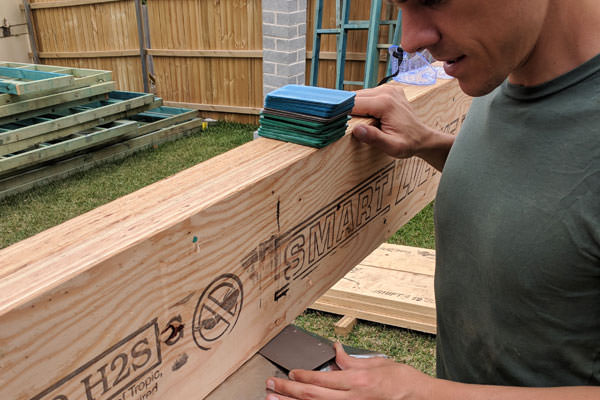
So, to get them to reach the same level, use plastic packers. These are little cards that you get from Bunnings, that come in sizes such as 1mm, 2mm, 3mm, 4mm, 5mm or 10mm.
Place a packer underneath every bearer, before you put the joist on. This will vary how big each joist is – that is, the bits that goes on top of the bearer, that make things go perpendicular, and so makes everything fall out of alignment.
But, if you put a plastic packer on each bearer, this will make every bearer dead straight. Just use a level (that is, a ruler with a little bubble in it), to make sure it is perfectly aligned.
So, the packers will help you to make sure your piers line up perfectly.
What Happens After Bearers and Joists are Laid
Bearers and joists are the flooring system for your granny flat – known in construction lingo as “yellow tongue”.
The floor goes straight on the joists. As long as everything is levelled
It is a fairly simple process – they all kind of just slip together.
Once these have been laid, you are ready to:
- Put your frame (that is, the walls) on top.
- Place either rafters (for a skillion roof), or trusses (for a pitched roof), making sure all is straight, plumb, and square.
- Put your roof on.
- Insert your windows.
- Install the sarking (a wall wrap that is placed in the exterior of, and under the windows, and acts a protectant against moisture, stopping water from coming in them).
- Sort out, and finalise, the rough-in for your Plumber.
- Call for an Electrician to come.
- Schedule for a roofer to come when you are laying either the exterior bricks for the brick veneer, or the cladding (the external wall covering).
- Get the plastering of your interior walls completed.
- Have your joinery fitted, in the kitchen, bathroom etc. (you can do each room as you like, no set sequence is required).
- Put down your internal flooring.
- Do your internal and external painting.
- Affix your lighting.
- Call for the Plumber and Electrician to visit again, so they can so their fit-outs (finishes) – that is, their last jobs. This concludes everything (i.e. your toilet, taps, and light switches will now all be fitted).
If you are interested in knowing more about any of these procedures, such as what parts you can do yourself, and where you can save money, more information is available in “How to Build a Granny Flat Step-By-Step – The Ultimate Guide“.
Spacing Your Bearers and Joists
Every granny flat is different. Depending on the engineering requirements you may space your bearers and joists out to different lengths. In most cases you engineer (or framing) company will let you know the spacing between the joists.
In my case they were spaced out at 450mm (Centre). That means from the left leading edge to the next left leading edge for instance they are 450mm apart.
To get a more comprehensive list of dimensions for your build, I highly recommend checking out the span tables here.
Conclusion
I hope reading this article has taught you a lot about how you can build your own granny flat on bearers and joists.
Even if you have never built a granny flat before, it is something you can do yourself. Though you may find it physically demanding, it is one of the easier parts for those with little experience.
If you are interested in knowing more about how to build yourself as an “owner-builder”, you can read all about how I went when I built my granny flat.


About Me

I built my own Granny Flat from scratch. This blog was created to share everything I learned along the way and to answer common questions. I hope it helps you build your own granny flat as well!