


When it comes to a quality granny flat – here is how to build a granny flat step-by-step:
- Complete certification to confirm you can build a granny flat
- Hire a surveyor and Engineer
- Hire a draftsperson or architect and a certifier
- Lay the foundation and erect the frame
- Install the roof, windows and sarking (wall covering outside)
- lay bricks or cladding
- Plaster walls, fit joinery, lay floors and paint
In this article I cover all these steps in detail. Breaking it all down…
Today I will also discuss how to build a granny flat efficiently and what parts you can build yourself.
DON'T PAY A FORTUNE FOR YOUR GRANNY FLAT. Find out how to deal with council and build a granny flat for the lowest cost possible. Learn More.
Plus answer:
- How long it takes to build your own granny flat?
- What parts to not “skimp” on?
- What trades you will need?
- How to save time and money?
To not waste any time, lets get into the meat of this article and highlight the detailed steps that need to be taken (In this exact order)
- Get a copy of your Section 10.7 Certificate and check if you are able build on your property.
- If all good, hire a surveyor, an engineer, and a designer – to check your land and provide you with reports/plans.
- Find a certifier – either private or local Council – and submit your application to build through Complying Development (CDC) or a Development Application (DA).
- Peg out your land.
- Build your foundation – either a concrete slab or construct piers.
- Lay the flooring (common flooring is particleboard sheet flooring).
- Put the pre-constructed frame up (walls).
- Fit the rafters if it is a skillion roof, or trusses if it is a pitched roof.
- Put the roof on (either colorbond or tiled roof in most cases)
- Put the windows in.
- Put in the sarking (also called “snakeskin”, a plastic that goes on outside and underneath the windows, acting as a moisture barrier, preventing water from being an issue inside).
- Complete the rough-in the plumber will do this.
- Arrange for the Electrician to come in.
- Lay the external brick veneers or cladding (outside wall covering).
- Have the internal walls plastered.
- Joinery fitted. The bathroom, kitchen, etc. These can be done in any order.
- Lay your flooring (either wood, vinyl, tiles or carpet is most common).
- Paint the walls
- Add your lighting.
- Arrange for the Plumber and Electrician to revisit and do their finishes (fit-outs) – their final bits. This finalises everything, such as fitting the toilet, taps and light switches.
Before grabbing the tools and starting work, be sure to read through the IMPORTANT FACTS below.

You will also need to factor in a budget for tools. However bigger tools can be hired
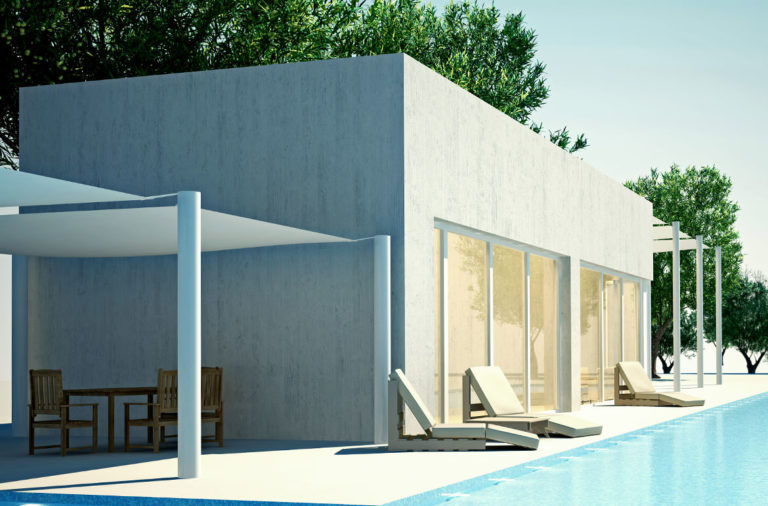
Once you have approval from council and the plans in your hand, the fun part begins.
How to Build a Granny Flat in Your Backyard
Firstly, it is totally up to you whether you want to take on the role of an “owner-builder” yourself. By doing so, you are taking over the role of project management yourself. To clarify, I will begin by explaining that by choosing to become a tradesperson, you could become a foreman, a builder, a carpenter, or even a handyman.
When building a granny flat, if you choose to employ a builder, they can get;
- A carpenter to do part of the job, as they are a trade qualified carpenter, and can do specific jobs as per their license (i.e. standing the frame, straightening the frame).
- A roofer, as they are a trade qualified roofer.
- A plumber, as they are a trade qualified plumber.
So, the builder will organise all of the trades themselves. As such, the builder holds all of the liability and insurances, as they are the individual/company that holds the license, and so they are responsible for the build.
Whereas, if you choose to be an owner-builder, you can get all these trades in yourself, but you are taking on full responsibility for these trades. You will save a lot of money in regards to the builders margin, but you will have to organise all of the trades – taking on the role of project management.
So, you do not necessarily need a foreman, although that is an option. A lot of owner-builders will bring in a carpenter, or someone more experienced than themselves, to run the job as a project manager.
A lot of the physical work can be done by yourself. I found much of it to be fairly straight forward
You will pay them to do that job, but they do not need to be employed through you – it can just be a contract rate. Whether you want to hire a foreman or pull the trades in yourself is totally up to you. It really depends on what knowledge you have, and how confident you feel as a project manager, as the responsibility falls on your shoulders.
A foreman, or project manager, is a good way to ensure the entire project works together. Everything from the excavation and concrete to the frames and the roof.
As all of these trades are separate entities – for example one can do your concrete slab, and that’s all – they don’t care about how the roof, the position of your stairs, the walls, and tiles, etc., all come together.
So, a project manager is the one who ties all of that together for you. If you do not feel as though you are experienced enough to take on the role, you can bring someone in to do it for you. However, if you feel confident within yourself, and have enough knowledge, you can do it yourself.
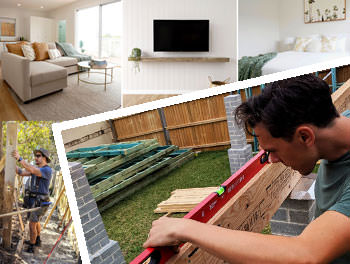
What Parts Can You Build Yourself?
Even if you have never built before, you will find there are many things that you can do yourself. Some, though they may challenge you physically, are easier if you have no prior experience, such as;
- The final fix out.
- All of the architraves.
- Laying floor coverings (i.e. carpet).
- Painting.
- Putting in a flat packed kitchen.
- Digging ditches or footings.
- Laying bearers and joists.
Others can be a bit more difficult when you have no experience, including;
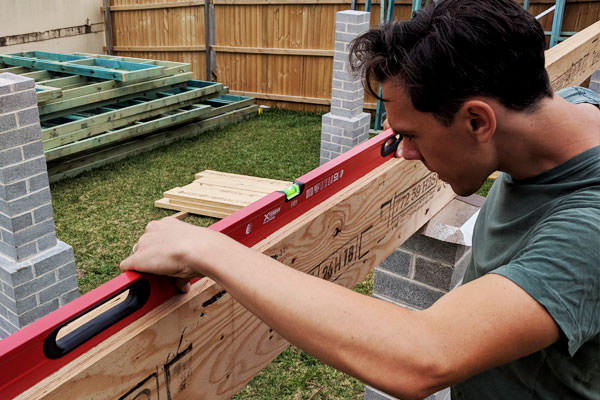
- Raising the frame of the granny flat and making sure everything is plumb and straight.
- Installing windows, doors, and shower screens.
- Guttering, downpipes and placing your noggins at the positions determined by the plumber on the frame (if allowed by your Council).
- Laying bricks.
- Roofing.
Fitting the roof can be tricky along with other key components
However, these tasks are certainly not impossible, they can just be more challenging on someone who has never done them before. But, do not let that stop you from trying. It will definitely help if you have some spare time, and it does not bother you if it will take you a bit longer than it would others. Consider it a learning experience.
What Trades Are Required for Your Granny Flat
Though you may have gained your “owner-builder” certificate, you are not a fully qualified tradesperson. Some jobs are best left to the professionals. Anything structural, anything to do with installation, anything to do with an inspection required by a certifier, you cannot do yourself.
You will need a licensed plumber and a licensed electrician – anything plumbing or electrical, you cannot do yourself. Any connections of any services cannot be done by yourself – you need to get that done by a trade.
These are all highly dangerous, and your safety is the main priority.
How to Save on Building Your Granny Flat
There are several ways you can save as an ‘owner-builder’ whilst building your granny flat. Firstly, if you are performing the role of the foreman and doing the project management, you are already saving money.
But you will save the most money doing any of the manual labour tasks you can. Labour costs a lot of money, especially in Australia – on average, a labourer will charge hundreds of dollars a day. So, any of the jobs that I mentioned in “What Parts Can You Build Yourself” is money saved.
The next place you can save money is on building materials. If you hire a builder, they will add a mark-up on top of their building materials.

So, by sourcing the building materials yourself, you can save a lot of money. You just need to know when to skimp.
Save money and buy used items that won’t require replacement parts, such as;
- Flooring
- Light fixtures
- Interior Design Features
I recommend looking on Gumtree, eBay, and Facebook Marketplace. Searching online for a ‘recycled building materials yard’ will also give you a lot of options. Also, save money on disposing rubbish and reuse materials wherever possible – for example, off-cuts of timber can be used for shelving.
Rather than buying custom-made items, it is also worth considering buying custom-made items for highly expensive goods, such as:
- Cabinets
- Bench-tops
- Shelves
Knowing when to skimp and when to splurge on sources can save you loads. The key to this is considering your costs at every stage of the build.
What You Can Absolutely Not Skimp on When Building a Granny Flat
When building your granny flat, knowing when to spend is highly important.
It is vital that you DO NOT skimp on anything to do with your:
- Foundation
- Frame (the structure), or
- Roof.
Basically, this category can be narrowed down to anything that shields you from water, as water is the source of the biggest damage to any property.
This makes water the nemesis of any builder, developer or project manager, as:
- It makes projects go for longer than intended, and
- Water leakage is the cause of most cases of water leakage (for example, to electricity through the walls or roof).
So, ensure you a buy high-quality:
- Roof, and
- Frame.
As well as:
- Windows.
- Walls, and
- Cladding.
Overall, it is best that you buy high-quality (rather than second-hand) products for installation.

You want trusted warranties for important appliances
So, I recommend that you buy a retail:
- Hot water system, and
- Air-conditioner.
This is as companies are likely to go out of business, so it will not be possible to purchase parts after a while. For example, do not skimp on cheap doors. These are likely to wear away over time, have handles and locks that will break, and will be unworkable and not possible to fix after some years.
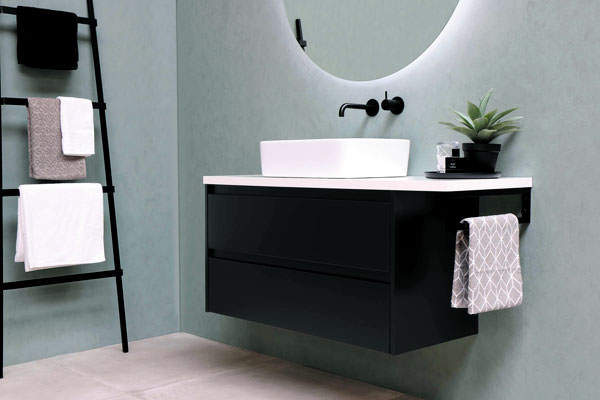
You must also consider which rooms are worth spending the most money on. The 2 rooms that people love most are kitchens and bathrooms, yet these are usually the costliest to build. However, do not skimp in these areas, and do not choose cheap appliances. You want the tenants to feel at home in these rooms, rather than want to renovate them.
Instead, save the money spent in the laundry, as this area is not used for resting, relaxing or entertaining. The trick is to think of the finished product – the end result you want to see. Then consider all the planning prior, everything that goes into getting those details correct.
I will elaborate on the importance of this under “Think of the Final Result”, but for now, let’s say, for for example, that you want a 400 x 400 tile in your bathroom. Then, you should make your walls a multiple of that form. Then, lay it out so it looks beautiful – otherwise, you could end up with a layout that does not look as good as you imagined (with tiles cut halfway through).
Pre-planning means a perfect (final) fit and finish
By then, it is also too late to make changes. So, start your design in your head from the finished product. Make sure you speak to your architect, drafter, or house designer about what you envision. That’s one reason why they cost a fair amount – with a designer you can start by talking about the product from the end.
Your bathroom, your tiles, and everything else you foresee are already in their plan, then they will strip them away and ensure the finished product is exactly what you wanted. This ensures you will have a multiple of 400 x 400 tiles, with a positioning of five, and it will be backed up against your kitchen wall this way, etc.
An important note about a house designer is that they can create a choice of great colours, finishes, etc., for you. However, they unlike an architect or draftsperson, they cannot draw up construction plans.
How Long Does It Take to Build a Granny Flat?
As an owner-builder, even if you have never built anything before, give yourself only roughly 6 months to build your very own granny flat.
You can even get it finished faster, depending on:
- How the trades are scheduled – if you take the time rather than rushing, have the knowledge, and are good at planning. Or,
- Whether you have a foreman.
- How much you plan on doing yourself
Although it sounds contradictory to tell you to take your time, it helps when a tradesperson, with a bit of knowledge to dissect your granny flat, has told you where you might find a problem. Rather than rushing forward and meeting that problem head-first in the future, it is best to slowly work through that problem, before it is harder to fix.
What is the Best Way to Start?
To start building your granny flat, I suggest you:
- Order your frame in advance.
- Prepare the foundation, then
- Take some time off work, let’s say 1 month, on the day the frame is being delivered, as you are ready to begin building.
If you hire a builder to help you with the frame, this can be up in 1.5 – 2 days.
Next, you put:
- The trusses (if a pitched roof), or rafters (if a skillion roof) put in, and make sure everything is straight, plumb, and square.
- The roof on, and windows in.
- The sarking (a moisture barrier that stops water getting inside the windows) in.
- Do the rough-in for the Plumber, and organise for an electrician to come.
- Get a roofer when the cladding is being put on, or bricks are being laid for the brick veneer.
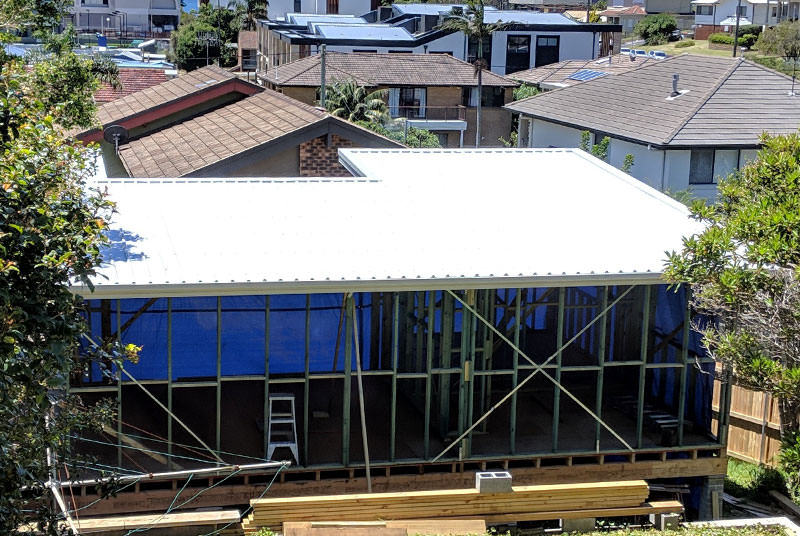
If all trades are organised correctly, this can complete in a month. It is now at “lock-up stage”, meaning it will not be affected by bad weather. So, you can now take your time finishing the rest. Because at the “lockup” stage the weather won’t stop your progress on getting everything completed.
Think About the Final Result
When designing your granny flat, picture what you want the dwelling to look like when building has finished. This includes what you want to place inside and around the granny flat, and who the occupants are going to be – both now and in the future.
The reason this is so important? So your designers can draw a granny flat that includes everything that you envision, down to the placement of every bit of furniture, and every single nut and bolt required.
So, start by thinking what you want in the secondary dwelling – seeing the final product and then taking it back from there.
For example, let’s say you picture a big piece of artwork hanging on the walls. It is important to foresee this, as it means that you can put in some noggins (a piece of timber that goes in between the vertical frame portions of the granny flat).
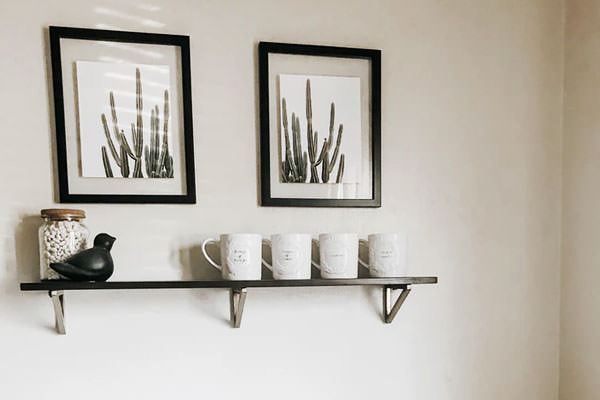
For wall installations you should add more timber between your frame.
These means that, when you put it in between the frame you can hammer in a hook or the like straight into the wall, so it is not resting on the plasterboard. This way, the heavy piece of art that you wanted hanging on the wall will not fall down.
Another example is if you are thinking about putting heavy outdoor furniture outside, such as a stone table. If so, make sure that you put strong enough reinforcements in the deck that is going to be holding this up.
You can really benefit from starting from the finished product – so, how you think the dwelling is going to be occupied, and then stripping it down from there.
Conclusion
What are you waiting for – it is worth a try! Just make sure you plan everything before beginning and have set a practical scheduled that suits your work/life balance. Also, be realistic about any physical work you can do – please do everything you can to keep yourself safe when building.
I hope this step-by-step guide will provide you with inspiration to start building your own granny flat 🙂
If you’re interested in finding out how I went when building my granny flat, more information is available here.


About Me
I built my own Granny Flat from scratch. This blog was created to share everything I learned along the way and to answer common questions. I hope it helps you build your own granny flat as well!