


If you’re planning on building a granny flat, you’ll need to be prepared. So, what needs to be done before building a granny flat?
It will help to discuss your plans with the local Council, to make your approval process as smooth as possible. Plan out all the certificates you will need with council and decide if you can build your granny flat with a CDC or you require a DA.
Today, I will discuss what questions need to be answered before you can begin construction. And whether you can miss any of these steps to speed up the building process.
DON'T PAY A FORTUNE FOR YOUR GRANNY FLAT. Find out how to deal with council and build a granny flat for the lowest cost possible. Learn More.
*For a detailed look at the certificates required click here.
What Questions Need to be Answered Before Construction Can Begin?
When building a granny flat, many questions need to be answered to establish your chance of approval.

It is a great feeling to tick off what needs to be done.
Let’s start with the 4 key requirements:
- Is it being constructed in conjunction with another dwelling (the main home) and not before?
- Is it on the same block of land as the principal dwelling (not an individual lot in a strata plan, or community title scheme)?
- Is there only one principal dwelling (that is, the land is not subdivided with an existing secondary dwelling)?
- Do you have enough space to build a granny flat?
Your answer to these questions must be YES.
Now we can move onto the key setback, size, and legal requirements for your block.
The next important question to ask yourself is – “Is my property big enough?”.
It’s time to start doing your research.
Council requirements usually include a minimum block size before granting permission for a granny flat. This differs between states:
- NSW – Minimum 450sqm.
- QLD – Small lots under 450sqm may be allowed.
- WA – 450sqm, unless your local Council states otherwise.
- VIC – Minimum 450sqm.
- ACT – Minimum 500sqm.
- TAS – No obvious rule, contact your local Council.
- NT – Not specified, contact your local Council.
Still, if your property meets the minimum size, it doesn’t necessarily mean you can fit a granny flat, you need to:
- Look at your site and consider requirements such as Setbacks.
A minimum distance is required between the granny flat and the main home (or a fire-rated wall is needed).
This varies between local Councils, so I suggest you check with yours.
If your property is under 900sqm, the granny flat must be at least:
- 3m from the back of your block,
- 0.9m from side boundaries, and
- The front setback must be the average of the setbacks of the two nearest dwellings.
If your block is bigger than 900sqm, your setbacks start increasing.
Additional setbacks may also be required for granny flat that exceeds 3.8 metres in height. For even great detail see all of the setbacks and boundaries for granny flats in one place.
You must look at trees – generally, if there is a tree that is taller than 6m, you need to keep a certain distance from it.
This varies between Councils, so I suggest you contact yours for specific advice. Otherwise you may be able to follow other rules about demountable cabins or tiny homes such as what Cabins offers on their website.
You must also provide the appropriate space for privacy between the two dwellings which is generally:
- Property size – 450-600sqm = 20%
- Property size – 600-900sqm = 25%
- Property size – 900-1500sqm = 35%
- Property size – 1500sqm plus = 45%
Though, this changes between Councils, so I recommend you contact yours for their exact regulations
As does whether you must provide parking or not
- Some Councils’ require 1 parking spot at the granny flat.
- Some do not require a parking space, if the principal dwelling has off-street parking.
Again, I suggest you contact your local Council for their regulations. If parking is required here are some suggestions for building a granny flat with a garage.
If you have taken all of this into consideration and still think a granny flat will fit on your land, it’s time to start considering the next lot of possible constraints.
I suggest you get a Section 10.7 Certificate from your Council. These normally cost $50+ but is a:
- “Zoning” certificate, showing the restrictions on your property.
Zoning determines what is legally allowed to be built on a block of land, so your Council will only allow granny flats to be built on some zones.
This information can be gained from their website or by calling them.
Your Section 10.7 Certificate will also show you whether your property is affected by any hazards, such as:
- Bushfire
- Flooding
- Heritage, etc.
These could prevent you from building or add unexpected costs to your development.
For more information on Zoning, see more in-depth detail on:
- Specific Granny Flat Zoning Requirements
- Granny Flats in a Flood Zone
- Granny Flats in Fire Prone Areas
If there are no restraints on your property, you are now ready to find a design and begin your approval process.
Getting your plans approved will take at least 20 days if you can build using a CDC, so start early. If you can’t build your granny flat with a CDC and require to build with a DA, this will take much longer.
Can You Miss Any of These Steps to Build Quicker?
No. It is important you do your research and have the knowledge to build a granny flat. If you rush to make plans without answering these questions, you’re risking being denied approval.
As you can see, many things, such as setbacks, vary between Councils, so it is best to discuss your plans with them. Also, obtain a Section 10.7 Certificate and check all restrictions on your property, so you’re aware of all possible delays or additional costs.
What to be Prepared for Once Building Commences
You’ve done your research, found your perfect granny flat design and builder, and waited patiently for approval.
Now, building can finally start.
A well-organised builder will have a schedule ready to go at the initial design stage, before the building permit is given. Look-out for this, as it is a great way of knowing your builder can stay organised throughout the project.
This schedule helps them oversee their tradies, arrange deliveries, and ensure they finish on deadline.
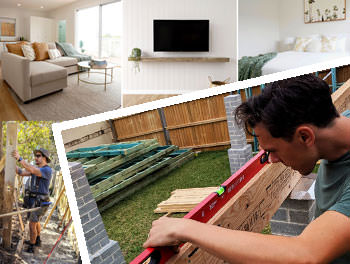
The building process involves:
- Site preparation – They will start by clearing any unwanted trees or existing structures (yes, even your shed).
It’s best to do some of this yourself – see “What Can Hold Up a Granny Flat Build” below.
Then, the land is excavated and levelled, and the boundaries for your granny flat are marked.
There will be a lot of tradies coming and going for days.
But soon you will be able to see the outline of your granny flat.
- Piers & Slab Foundation – With the areas clear and boundaries marked, excavation can be performed.
Then, the supportive concrete slab is poured, and the piers erected.
A termite treatment is also incorporated before the slab is poured.
This is the framework of the entire building, so you will now be able to start to visualise it’s overall shape and layout.
*Please note – Now you know exactly where your granny flat will be located, you can start working on your landscaping.
You will know how much room is available so can decide where to put things such as your clothesline, a shed, or garden.
By keeping everything nicely spaced, you won’t get in the way of the build.
- Frames – Typically steel or timber, now frames for the walls and roof will be put up.
You will now be able to identify the rooms and have some idea of where the windows and doors will be.
- Lock-up – Now that the frames are installed, exterior work begins. The roof will be installed, windows and doors placed.
You will now be able to see a resemblance of your granny flat.
The first stage of electrical and plumbing work will also be done.
After lock-up is complete, a thorough inspection of works is done.
Your site is cleared of unused materials and preparation for the next stage begins.
- Insulation, internal and external work – Insulation is placed in the walls and ceiling.
External painting and the second phase of termite treatment is completed.
- Kitchen, bathroom, etc. – Now your granny really starts coming to life. A tiler comes to site.
Your chosen fittings in your kitchen such as cabinets, pantry, oven, etc. will be installed.
You will also see toilets, sinks, showers, vanities, and taps being moved in. Your granny flat is almost finished.
- Painting, flooring, finishes – This is the final stage. The interior will be painted.
Your chosen flooring will be completed. The rest of the interior (i.e. shower screens, mirrors, etc.) will be fitted.
Your builder will do a final check-over and tidy the granny flat, then hand your keys over!
Now your granny flat is built, an Occupation Certificate is arranged before you can move in.
What Can Hold Up a Granny Flat Build, and How to Prevent This
As mentioned, you’ll see your builders do site preparation – clearing any debris or obstacles in your backyard.
They need to make sure there is enough space for their materials and tools. So, if there’s any existing structures in your backyard (i.e. a shed or cubby house), they’ll be demolished. It’s best to do this part of the process yourself or hire a third-party, as it will save you both time and money.
Site preparation works are generally not in a builder’s quote.
If there is anything in your yard you wish to keep, (i.e. pot plants or ornaments), move these temporarily or they will be destructed.
It’s also a wise idea that you discuss your building plans with your neighbours.
During the approval process, (if you are approved through a DA) your neighbours are given a chance to protest. If you speak to them first, you may clear up any issues.
Also, if there are any cars that are normally parked on your street, they may need to be moved on some days, to:
- Allow access for tradesman or heavy machinery.
It is helpful if you know who owns these cars and speak to them, advising them of your intentions.
Conclusion
It is important to do your research prior to building a granny flat, to find out whether you are likely to be approved.
I suggest you contact your local Council for their regulations and obtain a copy of your Section 10.7 Certificate.
And find out which method through either a DA or a CDC is required to build a granny flat.
With the aid of a council or private certifier, they will be able to guide you through the process and help in the most efficient way to build your granny flat if you are unsure.
It certainly helps to also cost your granny flat build and ensure you have money saved for contingency, incase costs rise due to unforeseen circumstances.
I hope this article has helped with a framework on where to start. Check out DIY Granny Flat to gather all the resources you will need.
You May Also Like

About Me
I built my own Granny Flat from scratch. This blog was created to share everything I learned along the way and to answer common questions. I hope it helps you build your own granny flat as well!