


If you are building a granny flat, it is important to put a lot of thought into your design, as to make the best possible use of all your available floor space. So, how should you layout a granny flat?
- If possible, with the main areas facing north.
- Combine rooms (i.e. an “open plan” design) as much as possible, reducing internal walls.
- Have your bathroom sharing the same “wet wall” with your kitchen.
- Use “thinner” building material for your walls, so they do not take room from your floor space.
- Include rooms that can be used in multiple ways.
- Ensure bedrooms are close to 3 x 3m if possible for ample room
Today I will discuss how to position the spaces every granny flat has to make it a home.
I will also focus on how to craft a design perfectly suiting your target market or ideal tenant.
DON'T PAY A FORTUNE FOR YOUR GRANNY FLAT. Find out how to deal with council and build a granny flat for the lowest cost possible. Learn More.
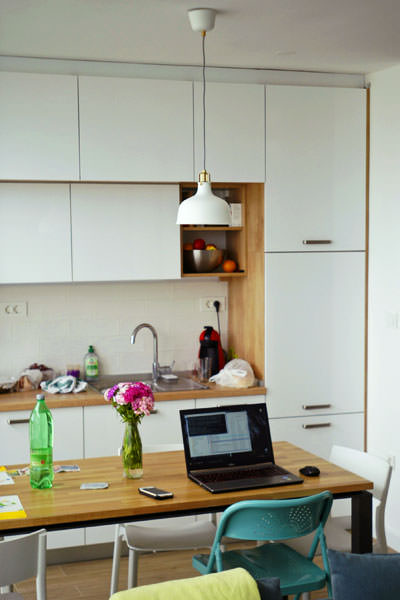
How Your Kitchen Should be Positioned
Open plan designs are popular, and will also save you a lot of space, as you will read about in “Reduce Walls if You Can” below.
So, a great place to position your kitchen is have your granny flat with a glass sliding door open up into a living area, which then flows freely through into a dining area and then a kitchen at the back.
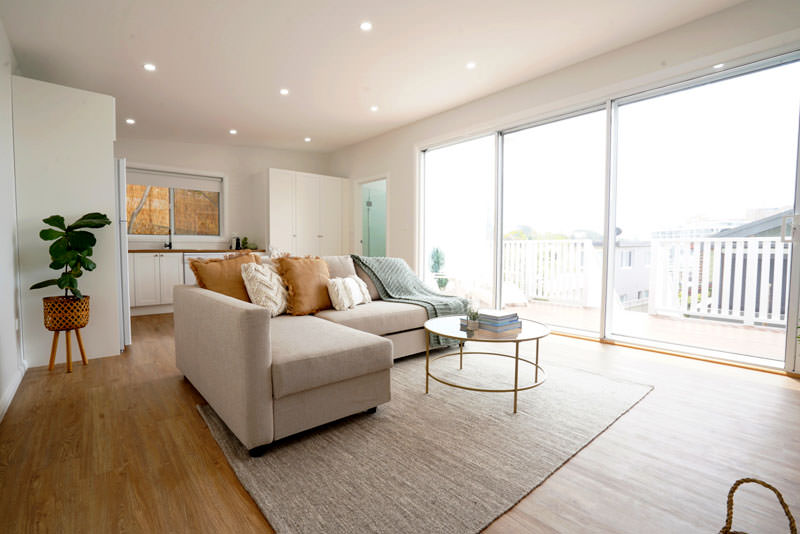
Open plan living, creating a connection to an outdoor deck. (Decks are not limited to a certain size)
If possible, the granny flat should also be placed north facing. By doing so, while having your living area at the front with your kitchen behind, you are incorporating passive solar heating into your dwelling.
Using free heating from the sun is the cheapest way to heat your granny flat and can save you significantly on energy bills, come Winter time.
Another reason I have placed the kitchen at the back is in relation to where your bathroom should be, which I’ll cover in a little more detail.
Where Should Your Bathroom Be?
Bathrooms are one of the hardest rooms to position.
This is as they are the most complex, because they require:
- Extra reinforcement in some cases
- Plumbing
- Waterproofing
- Wiring
If possible, it is best to place your bathroom so it shares the same “wet wall” with the kitchen.
This means to place the bathroom with its back against your kitchen. So if you want to cover your kitchen with villaboard lining it does make it easier, however it is not required.
The main reason that a bathroom and kitchen should share the same wall is to reduce the cost of plumbing. All water pipes and drainage pipes should be placed as close together as possible. The closer your source of water and drainage is, means:
- Less cost of labour to install everything
- Easier for a plumber to install everything
- Less expense of materials (no long pipes going from one side of the granny flat to the other)
- Creates a straight line for the connections of the drains and vent stacks.
By doing so, the whole process of constructing your bathroom and kitchen will be far cheaper. There will be:
- Less confusion between you and your trades
- A lot less mistakes made, as the plumbing and sewerage for the secondary dwelling will be straight forward.
I was advised of this when building my granny flat:
All my plumbing is connected behind one wall.
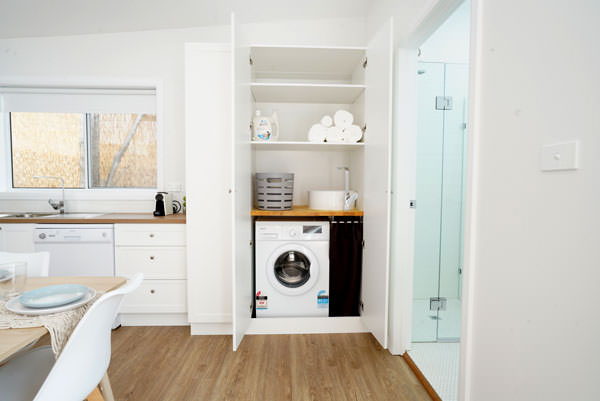
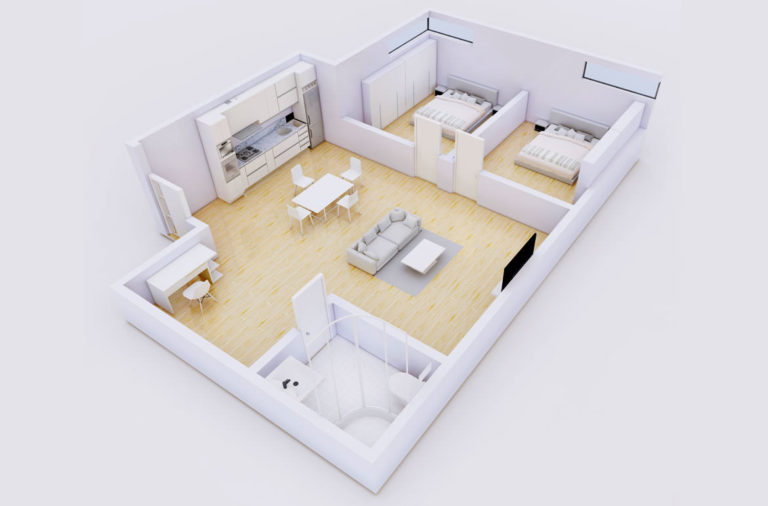
What makes this design easy to construct is that it has:
- An open plan living and dining area at the front, which you can enter through a glass sliding door.
- A kitchen at the back, which is placed next to the “Laundry”
- A bathroom directly adjacent
- All the drainage is installed within a few metres of each other (underneath)
Reduce Walls if You Can
A little-known fact is that the building material you use will actually reduce the amount of internal floor space you have available.
This is as the 2009 edition of the SEPP (SEPP SUMMARY) advised that:
- The floor space of a granny flat must be measured from its’ outer walls, NOT INTERNALLY.
This means that the thicker the building material is that you use on the walls of your granny flat, the greater affect it will have on the amount of floor space that you have left to use. As such, it is important to consider reducing the walls, thus increasing your floor space, by choosing a:
- Building material for the walls that is not as thick, that is instead a thinner material such as cement sheeting as opposed to brick veneer.
For example, you could choose to construct your walls from timber and cladding (there are a huge range of panels you can now use for outside walls).
Choosing this option, rather than choosing to build your walls with double brick, could allow you up to 5 square metres more internal floor space. This is the typical floor size of a bathroom in a granny flat, hence why something as simple as the building materials for your walls is such an important factor when creating your design.
Something else to think about is to reduce any internal walls that may not be necessary.
Not only is an open plan design actually preferred these days, but combining rooms can create a lot of extra space, as internal walls also take up floor space.
Examples of open plan design ideas that reduce the need for internal walls are:
- A 1-bedroom granny flat (rather than a 2-bedroom). But you can have a “study nook” in the corner of your living room where you planned on having the second bedroom. This adjustment saves the need for at least 2 walls.
- An open plan kitchen, that freely flows through into the dining area and living area. No internal walls at all are needed.
- Combining the laundry and bathroom into one room, which keeps all utilities in the one area, and reduces the need for yet another dividing wall.
I have created an article that provides examples of just how these layouts can work for your space.
Multi-Use Design for Your Living Room
Again, as a granny flat is a small dwelling, it is a wise and space-saving idea to have rooms that are multi-functional. Flexibility with space, layouts that have more than one purpose, these are all great ideas to integrate into your design.
It is important to know though, that for multi-use spaces to work well, they need to be easily adaptable.
If it takes too long, or too much effort, to transform the space, they will not be used as such – they will instead end up reverting back to what they were initially meant to be used for.
An idea for a multi-use design in your living room is:
- You can also use your living room as your home office. Being creative with your design means you can work from your granny flat.
Home Office / Dining Room?
A longer table means you can go about business, whilst still having plenty of space to prepare and eat food.
I found this great article that shows you how you can incorporate an “office nook” into any small space.
If you have children, a living room can also be used as a play area. It helps to incorporate storage into your initial design plan. Or, a “study nook” in the living area can also be used for storage for their toys, as well as a place for them to:
- Do homework.
- Read.
- Colour or draw.
It may help to enlist the help of an architect to create a multi-use design that will work well.
You can also read all about architecturally designed spaces for inspiration.
Design for Your Target Market or Ideal Tenant
Ensure your bedrooms are as close to 3m x 3m as possible, this allows room for a bed and a chest of draws. If you don’t already have plans for built-in wardrobes.
When rooms are smaller than this the lack of space becomes very noticeable to tenants. They will be asking:
“How can I get furniture in and move around?”
When planning to build a granny flat, you may be thinking about renting it out. If so, you may already be thinking about your area, and your target market. It seems like the obvious thing to do would be to consider your demographics.
After all, things like access to public transport, parks, etc. will all affect what tenants are going to want to live in your granny flat.
But to get the best idea of who is best to design your layout for, the ideal people to talk to are estate agents in your area.
They know not only your area, but also the type of people in your area that are looking for rentals, better than anyone. You will gain valuable knowledge by having a chat to them, such as how to best design the layout for your target market.
As a result, you will also find out how much rent you will make in return on your build.
I would strongly suggest speaking to at least 3 real estate agents in your area before even beginning your build.
Conclusion
When building a granny flat, putting a lot of thought into your design is essential.
It helps to have an open plan design, with your living areas facing north to let the sun in. Your living area can also flow freely through to our dining area, then kitchen.
Your kitchen should share the same wall with your bathroom, as this will save you a lot of money on labour for plumbing and parts.
Reduce your walls if you can – both;
- The thickness of the building material, as this can take up to 5sqm from available your internal floor space, and
- Internal walls – open plan designs are favoured, and internal walls take up space as well.
Also create multi-use rooms, such as using your living room for both food preparation/eating, and a home office.
Finally, if planning on renting out, speak to your local estate agent, so you can create your design with your target market / ideal tenant in mind.


About Me
I built my own Granny Flat from scratch. This blog was created to share everything I learned along the way and to answer common questions. I hope it helps you build your own granny flat as well!